“Pruning potted plants may feel intimidating, but it doesn’t need billhooks or expert hands. With the right container gardening tips, even beginners can prune confidently, avoid pests, and boost plant health.”
I was less aware of professional pruning tools when I first shifted into container gardening full-time in 2020. Back in my ground-bed gardening days, my overgrown plants—actually more like small flowering trees—were always pruned by my househelp or nearby agri workers.
They used a traditional billhook to chop off branches effortlessly before the rainy season. Surprisingly, those trees rarely showed pruning wounds and within a month, they would burst back into blooms.
But container gardening is a different story. You don’t need aggressive or massive tools for your little green babies in pots. Most container plants thrive with gentle care using regular pruners or garden scissors, instead of heavy billhooks.
If you’re still unsure about the importance of pruning potted plants, you’re in the right place. Keep reading—I’ll share why pruning supports next season’s growth, helps avoid pests and fungal diseases, and keeps your container garden both healthy and budget-friendly.
Why Pruning Matters in Container Gardening (Even for Beginners)

There’s no space for myths in container gardening. Pruning isn’t scary or “exceptional”—it’s basic plant care.
Myth: If you prune the plants, they will die.
Truth: Proper pruning is not stripping all the leaves. It’s removing dead or diseased parts, crossing branches, and lightly shaping growth so the plant can use its energy better. In pots, especially with climbers and creepers, a simple pinch-back encourages branching and blooms.
Leaves do photosynthesize, yes—but excess foliage in a small container can hog energy and shade flower buds. Light, regular cuts after a bloom cycle and prompt removal of dead parts help the plant save energy and bounce back faster.
Myth: More leaves means more growth.
Truth: In containers, you must balance canopy and root space. Too much foliage in a small pot can stress the roots and show up as yellowing leaves, holes, burnt or curled edges—classic signs the root zone can’t keep up. For routine care, do regular pruning of dead bits and tidy the shape.
For overgrown plants, reduce gradually—avoid removing more than about 25–30% (roughly ¼) at one time. This keeps the plant neat without shocking it, which is critical for flowering plants in pots and fruiting plants in containers.
How pruning helps (real balcony garden results)
In container gardening, the pot is the entire root world. When a small root space is forced to support a huge canopy, the plant shows deficiency signs and often prioritizes leaves over flowers or fruits. Timely, gentle pruning:
- Improves light and airflow → fewer fungal issues, faster drying after watering.
- Redirects energy to buds and new shoots → better flowering after a short rest.
- Makes watering and fertilizing more effective because the plant isn’t overgrown.
- Keeps small-space gardens tidy and reduces pest hideouts.
And a safety note from my experience: I once ignored my money plant (pothos) pruning and later spotted a paper wasp nest tucked inside the vines. That was my cue to clean up the plant properly. (Spiders are usually helpful predators; bees are pollinators—don’t target them. If you ever find an active wasp nest, avoid DIY removal and prune only when it’s safe.)
Local/tropical tip (South India): I do a light pre-monsoon trim for airflow and a post-bloom shape-up. Avoid hard pruning during peak heat waves; aim for cooler mornings or late afternoons, and always use clean, sharp pruners rather than heavy tools meant for trees.
Signs Your Potted Plants Are Overgrown (And How to Spot Them Early)
For beginners, it’s hard to prune off all that lush growth after you’ve worked to make pots look full and thriving. But you can spot the signs that a plant is struggling to balance its energy — and a little timely pruning will save you headaches later.
Yellowing leaves, mushy stems, or overcrowded foliage
If you look closely at the foliage you’ll see the difference between healthy leaves and stressed, overgrown growth. Watch for: persistent yellow leaves and leaf-drop, brown or mushy stems, curled or scorched edges, and a general dull look. These are classic signs of overgrown potted plants and often mean the roots can’t keep up with the canopy.
What to do: remove dead or mushy bits first, then open the plant up so light and air reach inner branches. Don’t strip the plant bare — trim gently, removing about 20–30% of dense foliage at a time. Also check drainage and soil — soggy soil and poor airflow cause stem rot and fungal problems in containers.
Holes in leaves and pest hideouts
Holes usually mean pests are feeding, but dense overgrowth also creates perfect hiding spots for insects, paper wasps, spiders, ants, and fungal outbreaks. A tidy plant lets you spot and treat pests early.
What to do: prune crowded stems, remove badly eaten leaves, and inspect the undersides of leaves and leaf axils. Use gentle, targeted controls if you find caterpillars, snails, or mealybugs — and remember that pruning itself reduces pest habitat.
Looking to protect your container garden from pests—naturally and effectively? Dive into expert advice and discover eco‑friendly strategies by reading the full guide at My Pots Garden: Natural Pest Control for Container Gardening. Click here to explore the full blog post and boost your garden’s health the organic way!
Roots circling or popping through drainage holes (root-bound pots)
If water runs right through the pot and the top soil dries almost immediately, or if you see roots at the drainage holes or soil surface, your plant may be root bound. In small pots the roots have filled the space and can’t supply enough water and nutrients to a large canopy.
What to do: if you can’t upsize the pot: carefully lift the plant, loosen the root ball and cut away circling roots. You can trim up to about one-third of the root mass when repotting — but avoid excessive root loss. Refresh the soil with a well-draining potting mix and add organic matter. If you can move to a slightly larger pot, that’s usually the gentlest fix. Expect leaf quality and vigour to begin improving in 1–3 weeks depending on the plant.
Poor flowering or fruiting despite fertilizing
If a flowering or fruiting plant is all leaves and no blooms, it’s often a canopy-root balance or nutrition issue. Excess nitrogen (even from organic sources) encourages leafy growth at the expense of flowers. Also, an overgrown canopy shades bud sites and the plant simply sends energy to leaves.
What to do: prune excess foliage and pinch back growing tips on climbers and flowering plants to encourage branching and buds. Switch to a fertilizer formulated for flowering (look for bloom-boosting or balanced NPK with adequate phosphorus) and avoid heavy nitrogen feeds. Apply fertilizer at recommended rates and avoid heavy feeding immediately after a hard prune — wait until the plant begins to push new growth.
Quick action checklist (for busy beginners)
- Remove all clearly dead/mushy parts first.
- Prune only 20–30% of dense foliage at a time to avoid shock.
- If roots show, loosen the root ball and trim circling roots (max ≈ 1/3 root mass) or repot slightly larger.
- Improve potting mix with well-draining soil and well-aged compost.
- Use bloom-boosting or balanced fertilizer (reduce nitrogen if too leafy).
Inspect for pests after pruning — less clutter = fewer hiding spots.
Step-by-Step Guide to Pruning Container Plants Without Fear

The sound of pruning can feel scary at first, and many beginners fear losing a plant after making a wrong cut. But with the right methods and tools, pruning becomes easy, safe, and rewarding. The right tools don’t just prevent mistakes — they also make sure your potted plants recover quickly and thrive.
Tools You Actually Need
There are plenty of pruning tools available in the market at affordable prices. As a container gardener with plants under 3 feet and softer stems, you really don’t need heavy-duty gear. A few good-quality basics will carry you through your journey.
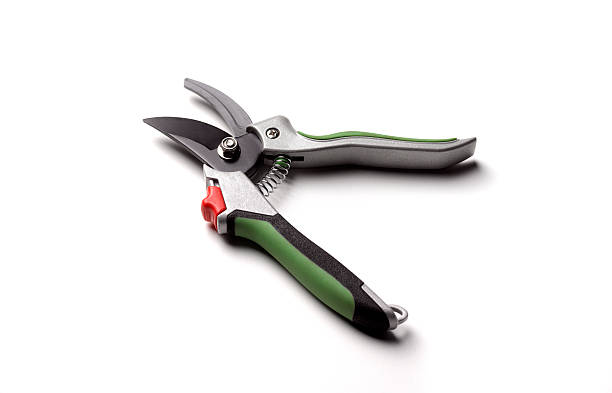
- Pruners and Scissors Combo
A must-have for any beginner. These are perfect for everyday cuts like trimming dead leaves, small branches, or shaping plants. A quality pruner will serve you for years.
Check out this [Pruners and scissors combo]
- Loppers
These are designed for harder stems, small hedges, or bushy plants. They give extra leverage for thicker cuts. While not needed for everyday balcony gardening, they’re handy if you’re managing bonsai, shrubs, or woody container plants.
See this [Loppers for hard stems]
- Hedge Shears
If you keep foliage-dominant plants or potted bushes, hedge shears are the easiest way to maintain neat shapes. They make trimming fast and keep the plant looking uniform.
Try this [Hedge shears for shaping plants]
- Pruning Snips
These are lightweight and precise, perfect for pinching herbs, deadheading flowers, or harvesting leaves without disturbing the whole plant. I personally prefer snips for basil, mint, or when pinching chrysanthemums.
Find [Pruning snips for herbs and flowers]
- Anvil Pruners
A heavier-duty tool compared to bypass pruners, great for propagation cuttings, thicker stems, and semi-woody plants. They don’t bend or break easily on tough stems.
Check [Anvil pruners for tough stems]
Why Choosing the Right Tool Matters
Using scissors on a thick stem or oversized shears on tiny herbs creates unnecessary stress for the plant (and for you). The correct tool ensures a clean cut, reduces the risk of pruning wounds and fungal infections, and saves time.
Think of it as an investment: a few reliable tools will make your container gardening pruning routine smoother, safer, and budget-friendly.
Best time to prune different plants
The timing of pruning makes all the difference in container gardening, especially because pots limit root space and recovery speed. While ground plants bounce back faster, potted plants need a little more planning.
- Flowering Plants (like hibiscus, chrysanthemum, ixora):
The best time is after the blooming cycle ends. Pruning right after flowers fade encourages new shoots and next season’s buds instead of wasting energy on spent blooms. - Fruiting Plants in Pots (tomato, chili, citrus, guava):
Prune lightly after fruit harvest to remove dead or weak branches and to prepare the plant for the next cycle. For long-fruiting plants (like chillies), pinch off excess side shoots during the season to direct energy into fruits. - Herbs (basil, mint, curry leaves, rosemary):
These thrive on regular pinching. The best time is when plants are 4–6 inches tall. Pinch or prune often to prevent legginess and encourage bushy growth. For perennial herbs like curry leaf, a light yearly trim in early spring works best. - Ornamental Foliage Plants (money plant, coleus, cordyline):
The best time is whenever they look leggy or out of shape. These aren’t fussy but avoid trimming during extreme heatwaves or just before shifting the pot. - Climbers & Creepers (bougainvillea, morning glory, jasmine):
The best time is just before the active growth season (spring in most tropical climates). Pinching tips also encourages branching and more flower sites. - Seasonal/Tropical Tip: In hot and humid climates (like South India), do light pre-monsoon pruning to avoid fungal spread, and post-bloom pruning in winter/early spring for shaping and rejuvenation.
How much to cut back without stressing the plant
Over-pruning is one of the most common beginner mistakes. The plant suddenly loses too much foliage, can’t photosynthesize properly, and goes into stress mode. A safe rule:
- For regular maintenance: remove only 10–20% of foliage (dead leaves, dried stems, faded flowers).
- For shaping or reviving: up to 25–30% of total foliage is safe. Always spread cuts evenly instead of chopping one side heavily.
- For severely overgrown plants: prune in stages across 2–3 weeks instead of one aggressive cut. This gives the plant recovery time.
- For root-bound plants (after root trim & repot): prune back about ⅓ of the top growth to balance the smaller root system.
- Golden rule: Never prune more than ⅓ of the plant’s foliage at one time unless you are dealing with a dying or diseased plant — those are exceptions.
Signs you’ve pruned correctly: The plant should perk up with new shoots within 1–3 weeks. If growth stalls or leaves droop, it may have been pruned too heavily or during the wrong season.
Pruning Mistakes I Made (So You Don’t Have To)
I always have mistakes to share in every gardening section. In my early container gardening days, it wasn’t the lack of information that failed me — it was the overwhelming mix of advice online and my lack of awareness about the basic pruning rules.
I was constantly confused about what worked and what didn’t. That’s why, throughout my website, I make it a point to clarify the core basics of pruning container plants so you can avoid the same costly errors.
Neglecting Deadheading on Chrysanthemums
This was my first and most expensive pruning mistake in my terrace garden. After a knee injury, I barely managed to keep my plants alive. Once my chrysanthemums finished blooming, I forgot to deadhead wilted flowers and remove dead foliage.
On top of that, my househelp overwatered the plastic pots — a perfect setup for fungal infections. I ended up losing half a dozen mums in one season.
Lesson: whether it’s chrysanthemums or any flowering plant, after the bloom cycle, always prune dead flowers, buds, and foliage. Clean the topsoil to prevent fungus. Lightly prune about ⅓ of the foliage so the plant can redirect energy to the roots and prepare for healthy new blooms.
Over-Pruning Small Herbs Like Basil
This was my “classic rookie mistake.” When I first learned about pruning, I got excited and trimmed basil and mint too aggressively. The result? Bald-looking herbs that wilted quickly. Luckily, I had backup saplings in other pots to save me from losing all my kitchen herbs.
Lesson: over-pruning is just as harmful as not pruning at all. Both can cost the plant its life. Always respect the ratio — don’t remove more than 25–30% of foliage at once. I now propagate cuttings before pruning mother plants and sometimes collect seeds first, just in case.
Cutting During the Wrong Season → Stunted Growth
Another mistake was pruning at the wrong time. I once pruned heavily in the peak of summer, thinking I was helping my plants — instead, I stressed them further, and they died faster than usual.
Why? Plants are already stressed in summer heat waves, strong winds, or during dormant phases. These are not the right times to prune.
Lesson: Ideal times are after spring blooms, before the monsoon, or plant-specific post-bloom periods. Always choose cooler parts of the day — early morning or late afternoon — for pruning.
Bonus tips:
- Use clean, sharp tools to avoid tearing stems.
- Place the pot on a stable, flat surface to avoid root shake.
- Water lightly after pruning to help recovery.
Not Sterilizing Tools → Fungal Infections Spread
This one hit me harder because I lost multiple plants to fungal spread from unclean tools. The pruning wounds became entry points for disease, simply because I used the same pruners on healthy plants after trimming diseased ones.
Lesson: You don’t need fancy sterilizers. Just dip the steel part of your pruners or scissors in water diluted with Dettol or any mild antiseptic, then dry them with a tissue or cotton cloth. For extra safety, leave them in sunlight to dry fully before storage. Always keep your pruning tools in a dry, clean place for long life.
Final Note
Every pruning mistake taught me a lesson that made my container gardening easier and more resilient. If you avoid these four common pitfalls, your plants will bounce back healthier, bloom more reliably, and you’ll prune with confidence instead of fear.
💨 Think wiping leaves is enough? Think again. Discover smarter dust-cleaning hacks for terrace plants in India.
Budget-Friendly Pruning & Plant Care Hacks I Swear By
I’ve learned that pruning doesn’t need expensive tools or fancy sprays. With a little creativity and mindful care, you can save money while still keeping your container garden thriving. Here are my go-to hacks that have stood the test of time (and my budget!).
Repurposing Old Scissors & Cleaning Blades with Vinegar
You don’t always need high-end pruners — if your plants are under 3 feet and stems aren’t too woody, a sturdy pair of household scissors works just fine. I still use my old kitchen scissors for herbs and soft-stemmed plants, along with my 4 year old pruner.
For cleaning, instead of chemical sprays, I swear by vinegar and water solution or Dettol. A quick wipe not only disinfects blades but also prevents rusting. This simple habit reduces the risk of fungal infections spreading between pots and extends the life of your tools.
Using Cuttings for Propagation → Saves Money on New Plants
One of my favorite budget-friendly gardening hacks is reusing cuttings. Whenever I prune basil, coleus, or even hibiscus, I don’t throw away healthy stems — I propagate them in water or moist soil.
Propagation saves money on buying new saplings and helps you multiply your garden for free. Plus, it’s deeply satisfying to watch new roots form. I often keep backup propagated plants in case one pot fails.
Composting Pruning Waste for Free Fertilizer
In the beginning, I made the mistake of tossing away all my pruning waste — stems, leaves, and dead flowers. Later, I realized these are gold for composting. But one rule, do not compose decayed, diseased or pest affected plant parts for composting.
Here’s how I do it:
- Collect soft stems, leaves, and deadheads in a small compost bin.
- Mix them with kitchen scraps (vegetable peels, coffee grounds) and dry material like cocopeat or dried leaves.
- In a few weeks, you’ll have a nutrient-rich, earthy compost that works beautifully as a natural fertilizer for container plants.
This not only cuts down on waste but also saves me money on store-bought fertilizers. Bonus: homemade compost improves soil texture and boosts microbial activity, keeping your pots alive with natural nutrition.
Seasonal Pruning Guide for Container Plants (Year-Round Care)
One of the biggest lessons I learned in container gardening is that pruning isn’t a one-time job. Each season asks for different care, and if you follow the rhythm of nature, your plants will reward you with healthier growth, blooms, and fewer problems. Here’s how I do seasonal pruning for my potted plants:
Summer – Cut Back Leggy Growth & Improve Airflow
Summerheat is brutal on container plants. Most of them stretch out searching for light and end up with leggy growth and weak stems. This is when I cut back long, straggly stems by about ⅓ to encourage bushier growth.
Airflow is a big deal in summer. Overcrowded foliage locks in heat and moisture, which stresses plants even more. A quick summer prune opens up space for air circulation and prevents leaves from burning or wilting too fast.
Monsoon – Disease Prevention with Light Pruning
The rainy season is when fungal infections, pests, and root rot show up uninvited. I don’t do heavy pruning during monsoons — instead, I focus on light pruning of overcrowded leaves, yellow foliage, and soggy stems.
This helps keep the plant dry, improves airflow, and stops fungal spread. I also keep pruning tools extra clean because a single cut can transfer fungus from one pot to another in this season.
Winter – Shaping Shrubs & Ornamentals for Spring
Winter is my favorite time for shaping container shrubs, perennials, and ornamentals. Plants slow down in winter, which means less shock when you prune. This is the season I gently trim bushes like gardenia, barleria, and evergreen foliage plants to give them a neat shape.
The trick is not to go overboard — just enough trimming so the plant looks tidy and is ready to burst with fresh growth when spring arrives. It’s like setting the stage for the next season’s show.
Early Spring – Hard Pruning for Roses, Hibiscus & Ixora
Early spring is the reset button for many flowering container plants. This is when I do hard pruning (cutting back up to half the old growth) for roses, hibiscus, and ixora. These plants respond best to strong pruning right before their active growing season.
It may feel scary to cut that much, but trust me — it encourages fresh shoots, stronger branches, and loads of new blooms. After hard pruning, I always add compost or a balanced fertilizer so the plant has the energy to bounce back.
Every smart gardener follows these tiny rules — but no one talks about them 🤫
Learn the 5 must-know tricks that make pots flourish 🌿
👉 Read the list now
FAQs on Pruning Potted Plants (Debunking More Myths)
Does pruning hurt the plant?
Not if you do it right. A lot of beginners (me included, back in my early gardening days) fear that pruning means “hurting” the plant. The truth is, pruning actually helps redirect energy to new shoots, stronger stems, and healthier blooms. What hurts the plant is over-pruning or pruning at the wrong season. Stick to the ⅓ rule (never cut more than one-third of the plant at once), and your plant will thank you with fresh growth.
Can I prune during flowering?
This is a tricky one. Light pruning like deadheading wilted flowers or trimming dry leaves is perfectly fine during flowering. But avoid heavy cuts when the plant is in full bloom — it can stress the plant and reduce flower production. The best time for bigger pruning is after the blooming season, so the plant stores energy for the next flush of flowers.
How often should I prune herbs like basil, mint, and curry leaves?
Herbs love regular trimming — it’s what keeps them bushy and prevents early flowering. For basil, pinch off the top leaves every 7–10 days once it’s established. Mint grows fast, so trim it weekly or whenever it gets leggy. Curry leaf plants respond well to pruning once every 2–3 months, encouraging side shoots instead of one tall stem.
The key is little and often, not aggressive cutting. And don’t forget — those cuttings can be used for propagation or kitchen use, so nothing goes to waste.
🌿 Final Thoughts
Embrace Imperfection, Not Perfection
Pruning isn’t about achieving that picture-perfect Instagram plant. It’s about keeping your potted plants healthy, balanced, and thriving. Mistakes will happen (I’ve made plenty myself), but every cut teaches you something new about your plant’s needs.
So, don’t fear the scissors — start small, observe, and adjust. Your plants will bounce back stronger than you think.
I’d love to hear from you — what pruning lessons have you learned in your container garden? Share your experiences in the comments so we can all grow together.
Also, check out my related guides for deeper care tips:


