“Discover how easy herbs can be to grow—even for beginners. From flavour-packed dishes to natural remedies, your potted herb garden can thrive with just simple care.”
 Herbs Are the Easiest—and Toughest—Plants I’ve Ever Grown
Herbs have been both the easiest and toughest plants I’ve ever grown in pots. Unlike other plants that struggled in my early gardening days, herbs actually managed to survive—even when I barely knew what I was doing.
Back then, I lacked awareness about container gardening and didn’t know much about potting mix or drainage. But surprisingly, my herbs grew well in plain garden soil and those old concrete pots I picked up from a nearby nursery.
Looking back, I now realise that the reason is simple—herbs are drought-tolerant and more resilient than many flowering or ornamental plants. They don’t demand too much attention, and they’re forgiving, even when conditions aren’t perfect.
 Herbs Don’t Need Fancy Care—Just the Basics
One thing I love about my herb garden is how low-maintenance it is. Unlike exotic plants or heavy feeders like tomatoes or chillies, herbs don’t need a lot of fertilizer or pampering. Just get the basics right:
- Use well-draining potting mix
- Place them in a spot with enough sunlight
- Water only when needed
That’s it. Do the basics well, and your herbs will not just survive—they’ll thrive in pots.
 Why Everyone Should Grow Herbs
There’s a reason I always recommend herbs for beginners. Some easy-to-grow kitchen herbs like coriander, mint, curry leaves, oregano, and rosemary are not just for flavoring your dishes—they’re also known for their medicinal properties.
In fact, growing herbs is more than just a culinary decision. It’s a lifestyle shift toward fresh living, natural wellness, and chemical-free home remedies.
There are also so many Indian herbs that grow beautifully in pots, with uses in:
- Skincare routines
- Hair care oils
- Remedies for mild cold, cough, and indigestion
 What You’ll Learn in This Blog
In this blog, I’ll be sharing:
- What herbs I’m currently growing in pots
- Why I chose these specific herbs for my small-space garden
- How I care for them—with simple steps that don’t overwhelm you
 Why Keep Reading?
Whether you’re a first-time gardener or someone looking to grow medicinal herbs at home, you’ll find practical tips, real experiences, and plant choices that work in Indian weather and with simple garden setups.
So, if you want a garden that gives back in terms of flavor, healing, and green joy, keep reading—you’re going to love what comes next.
✅ Step 1: Pick the Right Herbs to Start With
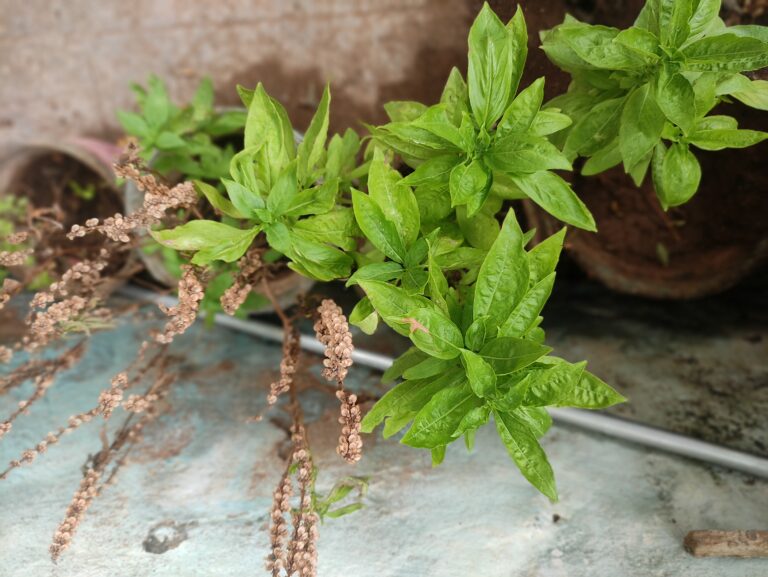
Choosing the right herbs that match your local climate and light availability helps avoid most of the beginner struggles in container gardening. While herbs are generally easy to grow, picking ones that naturally thrive in your area sets you up for success right from the start.
When herbs grow in their ideal conditions, you’ll notice faster vegetative growth, healthier root systems, fewer pest and disease issues, and more resilience—even if you occasionally forget to water.
 Beginner-Friendly Herbs I Grow Year-Round
These beginner-friendly herbs have been part of my front yard garden for years—not just because they’re low maintenance, but because I use them regularly for cooking, hair care, skincare, and simple home remedies for cold and cough.
Why these herbs work for beginners:
- Require only basic container gardening care
- Easily available in local nurseries or online
- Most can be grown from seeds, making them budget-friendly
- Thrive in Indian weather conditions
Here are the top herbs I personally grow and recommend:
 Basil
Basil
Basil isn’t just a culinary staple—it’s deeply rooted in Indian culture and traditional medicine. It’s one of the easiest herbs to grow in pots and perfect for beginners.
- Plant size: Grows up to 60 cm, bushier in wide pots
- Varieties: Sweet basil, purple basil, black basil, variegated types
- Soil: Well-draining with organic matter
- Sunlight: Needs 6–8 hours of full sun (or 12+ hours of bright light indoors)
- Watering: Sensitive to overwatering; ensure proper drainage
- Care tips:
- Use wide pots (shallow-rooted plant)
- Pinch flowers to promote leafy growth
- Collect seeds when leaves start shedding
 Mint
Mint
Mint is a fast-growing, fragrant herb that belongs to the leafy greens family. It’s perfect for beginners looking for a hardy, multipurpose herb.
- Growth habit: Perennial; spreads quickly in wide containers
- Pot size: Start with Rectangular pots and upsize as needed
- Sunlight: Prefers 5–6 hours of sun (best grown outdoors)
- Soil: Moist, well-draining with compost
- Fertiliser: Monthly liquid fertiliser feed in a 1:10 dilution
- Care tips:
- Keep in a separate pot to prevent overcrowding
- Regular pruning, pinching before flowering for best flavour
- Watch for pests like aphids and rust in humid seasons
 Coriander
Coriander is a must-have culinary herb in Indian kitchens, and it’s one of the easiest herbs to grow from seeds, even from the grocery store.
- Growth size: 30–60 cm tall, 15–30 cm spread
- Pot type: Prefer wide baskets or rectangular planters
- Soil: Moist, well-drained with compost
- Sunlight: 4–6 hours of morning sun or partial shade
- Care tips:
- Sow seeds 2 inches apart to avoid crowding
- Trim outer leaves to promote new growth
- Avoid high-nitrogen fertilisers—preserve its aroma
- Save seeds after flowering for the next planting
 Curry Leaves
If you have even a 1×1 ft ground bed, plant curry leaves. Otherwise, they can still thrive in containers with regular pot upgrades.
- Growth: Can reach 6 ft; prune for compact size
- Pot type: Start small; move to 12-inch+ containers or repurposed drums
- Soil: Well-draining with organic matter
- Sunlight: Needs 6–8 hours of sun; outdoor only
- Uses: Culinary, hair oil, improves hemoglobin when eaten raw
- Care tips:
- Prune bottom roots to restrict growth in pots
- Add compost annually
- Avoid overwatering; watch for pests
 Betel Leaves
Betel leaf is one of my all-time favourites. It’s a medicinal vine used for digestion, cold relief, and even minor inflammation.
- Growth: Climbs up to 6 ft with net or stake support
- Pot size: Mature plants need 12-inch–14-inch pots
- Soil: Rich loamy soil with good drainage
- Sunlight: 2–3 hours of mild sunlight; avoid harsh sun
- Care tips:
- Prune regularly to manage height
- Pinch mature leaves to encourage growth
- Prevent root rot by avoiding waterlogging
- Look out for aphids or mealybugs in humid conditions

- These are the long-term, low-maintenance herbs I’ve grown in my container garden without much effort. Once you gain confidence with these, you can start exploring more herbs that suit your interests and space.

👉 Want to know which pots actually make a difference? Read my guide on the 6 best pots for container gardening and discover tried-and-tested tips.
☀️ Step 2: Choose the Right Spot
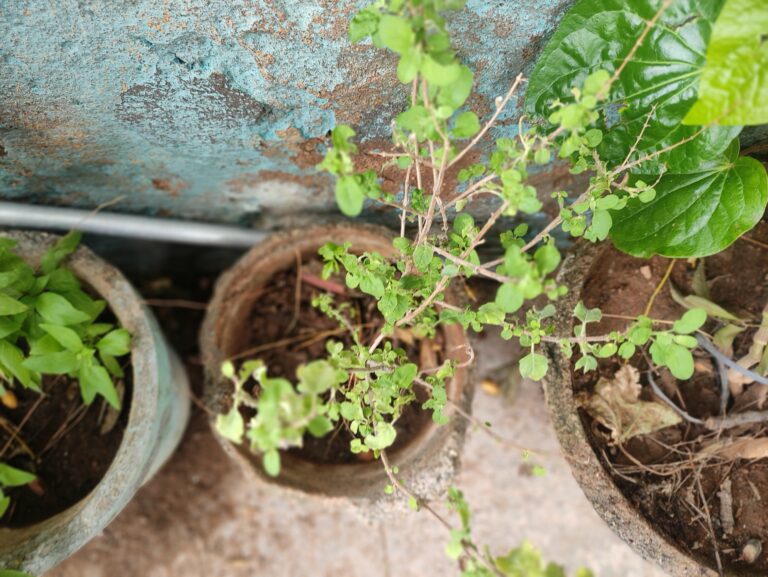
Outdoors or Indoors?
Most herbs are drought-tolerant medicinal shrubs that love sunlight. Shade-loving herbs are rare, and even those still need some direct or filtered light. A herb’s sunlight requirement often depends on its leaf color and variegation—darker leaves usually tolerate more intense sunlight, while lighter or variegated ones prefer softer light.
While it’s possible to grow herbs indoors, they need to be placed near sunny windows that receive at least 6–7 hours of indirect sunlight. But from my experience, outdoor spots like front yards, terraces, and balconies work best for growing herbs in pots.
In fact, most of my herbs only thrive in spots that get 6–7 hours of morning sun, especially those facing east. That soft, less-intense sunlight makes a big difference in healthy growth and leaf production.
Sunny Balcony, Kitchen Window, or Terrace?
With a bit of planning, you can turn any of these spaces into a productive herb garden.
Sunny Balcony
A balcony that receives 5–7 hours of sun is perfect for most herbs. If you have a south-facing balcony where the sun is harsh, especially in summer, use a shade net to prevent leaf scorch.
Kitchen Window
Even though it’s a small, tight space, a kitchen window herb garden is very doable. If your window gets 5+ hours of sunlight, make use of grills with hook hanging planters or window boxes to grow herbs for daily kitchen use.
Just make sure the window isn’t too close to the stove—heat radiation can damage both the herbs and the pots (especially plastic ones).
You can easily grow 2–3 herbs in a single window box planter, and it’s more than enough for everyday use.
Terrace Garden
Terrace gardens offer maximum flexibility. If you have a terrace with 6+ hours of indirect sunlight, you can grow a full-fledged herb garden for home use.
In extreme summer, move the pots to partial shade or use shade nets. With proper planning, you can grow all types of herbs in pots, whether it’s for cooking, skincare, or home remedies.
“You don’t need a big farm. Just a few sunny feet on your terrace is enough to start a thriving herb collection.”
At Least 4–6 Hours of Sunlight Daily
This is the golden rule for growing herbs: 4–6 hours of sunlight is the sweet spot. While each herb may have slight differences in its light preference, most fall within this range.
But not all sunlight is equal. Avoid exposing your herbs to:
- The harsh midday sun after 11 am
- The scorching afternoon light between 3–4 pm
Instead, choose spots that get:
- Morning sun (from sunrise to 11 am)
- Filtered or indirect light from noon to mid-afternoon
Direct, intense sun can burn the leaves, especially in summer. But the right amount of sunlight boosts aroma, flavour, and leaf production.
Want to make your container herb garden thrive with the right light and drainage? Check out this guide on mastering sunlight, space, and drainage for beginner-friendly tips that’ll set your herbs up for success: Container Gardening: Sunlight, Space & Drainage Tips.
Container Tip: What Pots to Use for Herbs?
You don’t need fancy ceramic or fiber pots to grow herbs successfully.
Terracotta Pots
If available locally, terracotta pots are ideal for herbs. They’re:
- Naturally breathable
- Help wick away excess moisture
- Keep the soil aerated
They support healthy root development and well-draining soil, which herbs love.
Plastic Pots (Budget-Friendly Option)
If you’re on a tight budget, plastic pots are perfectly fine too. Just make sure:
- There are 5–6 drainage holes at the bottom
- Add coconut husk or broken bricks at the base for extra drainage
- Elevate the pots slightly from the ground to prevent waterlogging
Plastic pots retain more moisture than terracotta, so a well-draining potting mix becomes even more important to avoid root rot or soggy soil.
“I grow my Bhringraj in a south-facing front yard—and it explodes with growth during monsoon!” (Blog Featured image)
Funny thing is, Bhringraj wasn’t even on my original herb list. I got a few stem cuttings from a neighbour, dropped them in an empty pot, and forgot about them. Now? It’s a wild, trailing mess I have to trim every few months!
Whether it’s a sunny balcony, a tiny kitchen window, or a sprawling terrace, you don’t need a big space—just the right light and potting setup.
Coming up next: Learn about the best potting mix for herbs, what mistakes to avoid, and how to keep your herbs healthy—even if you’re just getting started.
🪴 Step 3: Use a Good Potting Mix
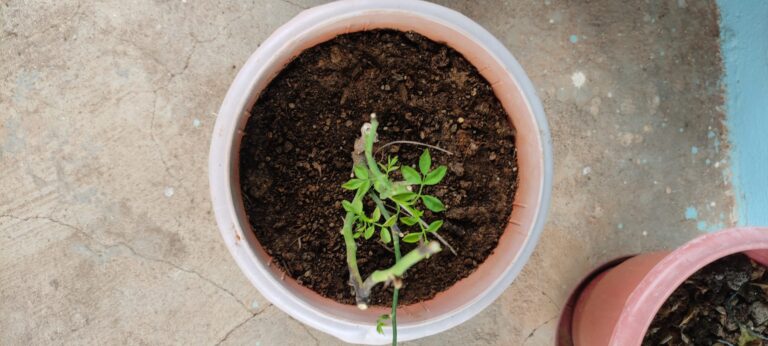
If you want your herbs to thrive in pots, a good potting mix is just as important as sunlight. Herbs hate soggy soil and poor drainage—so your mix needs to be lightweight, aerated, well-draining, and rich in organic matter.
Here’s my go-to herb potting mix recipe that I use for all my potted herbs—whether it’s coriander, mint, or curry leaves.
 Simple Potting Mix Recipe for Herbs

Cocopeat acts like a sponge—it holds moisture without making the soil soggy and improves aeration with its porous structure.
It’s a great amendment, especially for terrace gardens where you want a lightweight, sterile growing medium.

This organic combo feeds your herbs slowly over time.
- Vermicompost improves soil texture and microbial activity
- Well-rotted manure adds long-term nutrients
Together, they reduce your need for chemical fertilizers and help your herbs thrive naturally.

Sterilized loamy garden soil gives your potting mix structure and stability.
Never use unsterilized soil—it can introduce pests, weed seeds, and fungal infections that harm container plants.

Using perlite and vermiculite, along with these potting amendments, improves soil drainage, helping to prevent the sogginess caused by overwatering. This combination also maintains an aerated soil structure, allowing the shallow roots of herbs to penetrate easily and access water, nutrients, and oxygen, all of which are essential for root health.
Optional Tip:
Add a handful of neem cake powder to the mix. It’s an organic pest deterrent that protects your herbs from soil-borne diseases and strengthens the plant’s natural resilience.

 Why This Potting Mix Works
I didn’t get this potting mix combo right from the beginning. It came through trial and error—and once I switched to this, my herbs grew stronger, lasted longer, and had fewer pest problems.
What makes it work best is:
- Matching it with the right light conditions (Step 2)
- Avoiding overcrowding of pots
- Using a mix that creates a healthy micro-ecosystem in each container
This mix retains just enough moisture while ensuring great drainage, which is what most herbs like.

- A lot of new gardeners use heavy garden soil or potting mixes that hold too much water—and then wonder why the herbs start yellowing or wilting.
Trust me—this mix is beginner-friendly, budget-friendly, and gives your herbs the healthy start they deserve.

💧 Step 4: Watering Rules for Herbs in Pots
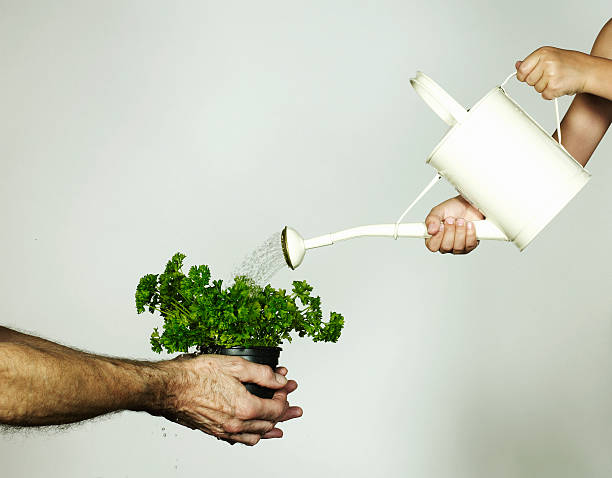
Watering balance is one of the hardest—and most important—lessons in container gardening.
I learned this the hard way, after losing several herb plants to both overwatering and underwatering.
In the beginning, I used terracotta pots, but as a solo gardener, it became difficult to manage their weight. So I switched to plastic pots, which are more convenient but hold moisture longer. I didn’t adjust my watering or drainage method—and that cost me a lot of plants.
If you’re using different pot materials, you must adjust your watering routine, potting mix, and drainage setup accordingly.
 Herbs Are Drought-Tolerant—But Not Waterlogged-Tolerant
Yes, herbs like mint, oregano, holy basil, and coriander are fairly drought-tolerant herbs—but they hate soggy roots.
Too much moisture leads to:
- Root rot
- Soil-borne diseases
- Pest problems
A well-drained pot and balanced watering routine are absolutely essential for growing healthy herbs in containers.
 Watering Tips for Container Herbs
 When to Water Herbs?
Only water your herbs in pots when the topsoil is dry.
Here’s how I check it:
- Touch the soil with your finger or a dry stick
- If the soil sticks, it’s still moist—don’t water yet
- If it partially sticks: wait a day or water lightly
- If it doesn’t stick at all: the soil is bone dry—go ahead and water deeply
Deep watering means watering the soil thoroughly until water comes out of the drainage holes. This encourages deeper root growth and avoids shallow, weak roots.


 Why Morning Watering is Best
Always water your herbs early in the morning.
Here’s why:
- Cooler temps mean slower evaporation
- Plants get time to absorb water gradually
- Excess water drains during the day, preventing fungal issues
- Humidity is lower in the morning, reducing the risk of disease
- Bonus: You can inspect your herbs properly in morning light!

 Don’t Overwater—Herbs Hate Soggy Roots
Soggy soil suffocates roots by blocking oxygen flow and leads to fungal diseases like root rot.
Signs of overwatering include:
- Yellowing leaves
- Mushy stems
- Foul-smelling soil
- Poor growth despite watering
And it’s not just herbs—almost all potted plants need proper air pockets in the potting mix. A well-aerated mix with cocopeat, compost, and sterilised garden soil supports healthy root function.
Plus, overwatering leaches nutrients faster from your mix, weakening the plant and making it more prone to pests and deficiencies.
 Pro Tips for Healthy Herb Watering
- Use well-draining potting mix (Step 3)
- Ensure 5–6 drainage holes in every pot
- Elevate pots slightly off the ground for better flow
- Water only when needed—don’t follow a fixed schedule
- In humid weather, reduce watering frequency
“Well-drained soil and deep watering help herbs develop strong roots,” says the India Gardening Association.
 What’s Next?
Now that you know how to water your herbs correctly, we’ll move to the next important step:

Don’t miss it—because a little care goes a long way in making your herb garden self-sustaining and productive.
✂️ Step 5: Prune & Harvest Regularly
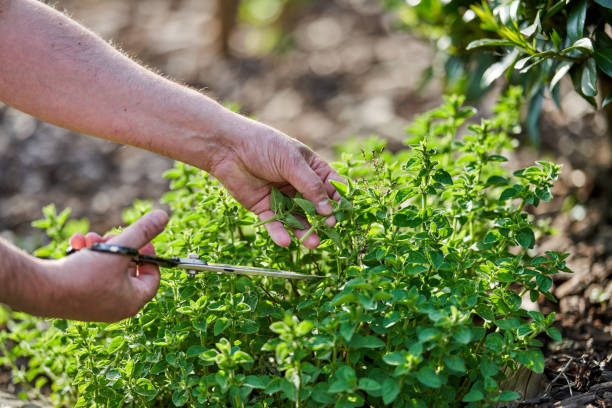
Pruning is the most underrated herb garden care tip—yet it’s the secret to longer life, bushier growth, and better yields.
Keeping your herb plants in shape isn’t just about neatness or garden aesthetics. A well-pruned herb plant is a healthier, more productive plant. It’s free of dead, wilted, or yellowing leaves that otherwise waste energy and attract pests.
 Why Pruning Herbs Is So Important
Most herbs thrive with regular pruning or harvesting.
Here’s why:
- It encourages bushy, compact growth
- Helps the plant redirect energy to new shoots
- Prevents disease by removing decay-prone parts
- Increases your yield over time
- Delays flowering and prolongs the leaf-growing season

 How to Prune Herbs Properly
Use this simple rule: only harvest or prune one-third of the plant at a time.
Never remove too much at once, as herbs need their foliage to continue photosynthesis and stay healthy.
- Always pinch or snip mature leaves and stems first
- Let younger leaves grow—they’re still developing
- Deadhead any flowers (unless you’re saving seeds)
- Remove yellow, wilted, or dry leaves regularly

 Use the Right Tool: Scissors Over Pruners
Most herbs—like basil, mint, oregano, and thyme—have delicate stems and foliage. Using bulky pruners or pulling by hand can damage the plant or disturb the roots.
Here’s what I recommend:
- Keep a clean, sharp pair of scissors just for pruning herbs
- Sanitise blades before use to prevent disease spread
- Keep them rust-free and avoid jagged cuts
- Use the tips to gently access tight spaces without disturbing the roots

 Stay Consistent With Pruning
Even if you don’t need herbs for the kitchen every day, do a light pruning or pinching weekly. It keeps your herb plants neat, encourages new growth, and prevents energy waste on non-productive parts.
Whether it’s a sunny windowsill herb garden, a terrace herb setup, or container-grown herbs on your balcony, pruning helps your herb garden stay vibrant and healthy.
🌱 Common Beginner Mistakes (And How to Avoid Them)
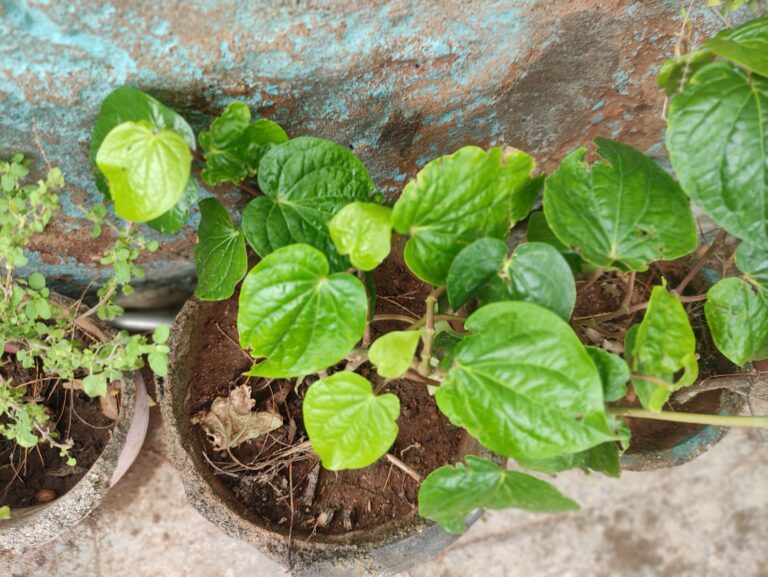
Even though herbs are easy to grow, there are a few common mistakes many beginners (including me) make in the early days of container herb gardening. I’ve learned these the hard way—by losing several plants. But once I understood the “why” behind these mistakes, everything started changing.
 1. Overwatering Herbs
Overwatering doesn’t always mean watering too often—it also means watering when the soil is still moist, or ignoring drainage issues completely.
Herbs in pots need well-drained soil. That means:
- Pots must have proper drainage holes
- Potting mix should be light and airy, not compact
- Avoid saucers filled with standing water
If water sits too long at the bottom, it leads to soggy roots, root rot, and even fungal diseases.
 2. Using Garden Soil Alone
One big mistake is using regular clay garden soil without mixing. It becomes compact, heavy, and makes it hard for herb roots (which are often shallow) to breathe and spread.
Instead, create a balanced potting mix for herbs in containers:
- 30% Cocopeat
- 30% Organic matter (compost + manure)
- 30% Sterilized garden soil
- 10% Perlite with neem cake powder for drainage & pest prevention
This kind of mix offers:
- Good oxygen flow
- Air pockets for root growth
- Lightweight structure ideal for potted herbs
 3. Believing Herbs Don’t Get Pests
There’s a common myth that herbs don’t attract pests due to their strong aroma. While they are less prone to pests, they’re not immune.
Here’s what causes pest problems in herbs:
- Overwatering and soggy soil
- Poor air circulation in bushy plants
- Excess nitrogen fertilizers reduce the natural aroma and resistance
To prevent pest attacks:
- Keep herbs in well-ventilated, sunny spots
- Don’t crowd too many herbs in one pot
- Prune herbs regularly to allow airflow and remove dead growth
 4. Skipping Regular Pruning
Pruning isn’t just about making your herb plants look neat—it’s essential for their health and longevity.
Unpruned herbs get leggy, weak, and more prone to pests or early flowering.
- Pinch off dead or yellowing leaves
- Harvest mature leaves regularly
- Deadhead flowers to encourage leafy growth
Proper pruning keeps the herb plants compact, healthy, and productive—even in small pots.
 Final Tip: Learn and Adjust As You Grow
Every pot, herb, and spot on your balcony or terrace reacts differently. Start small, observe how your herbs respond, and adjust care over time.
🔄 What to Expect in the First Month
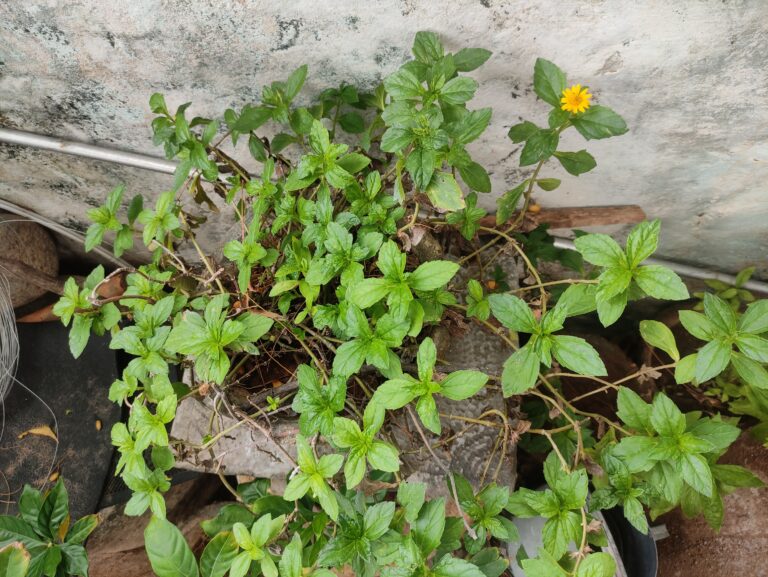
Growing herbs is exciting, but the first month is all about establishment and gentle care. Whether you’ve started from seeds or bought saplings from a nursery, knowing what to expect week by week helps you avoid early mistakes.
 Week 1–2: Settling In (Seedlings or Nursery Herbs)
If starting herbs from seeds:
In the first two weeks, you’ll see germination and the early stages of vegetative growth. Keep the soil moist but never soggy, as underwatering can wilt delicate seedlings within hours.
- Avoid direct sunlight until seedlings reach about 10 cm tall—instead, place them in bright, indirect light.
- Start with a mild diluted liquid fertilizer (1:10 ratio) to encourage steady growth.
If starting from nursery-bought saplings:
- Isolate new plants for 2–3 days instead of planting them right away.
- Don’t repot immediately—give them time to adjust while keeping the soil slightly moist.
- Check for pests or soil-borne diseases.
- If the nursery soil is compacted, gently loosen the roots and remove excess soil.
- Dip roots in a hydrogen peroxide solution (1:10) to disinfect, then repot in a container 2 inches wider than the root ball with well-draining potting mix.
- Add a small amount of Epsom salt to reduce transplant stress.
- Place in gentle morning sunlight until new leaves appear.
Once new growth starts, move them to their permanent garden or balcony spot, keeping proper plant spacing.
 Week 3: New Growth Appears
For seedlings, this is when true leaves become visible. Height will be around 1–3 inches, depending on the herb variety.
- Transplant to individual pots or thin overcrowded seedlings to prevent competition.
- Move pots to bright but indirect sunlight for 6–7 hours daily.
- Fertilise only once a month—too much feed can harm young plants.
- Keep soil lightly moist, as soggy soil can cause damping-off disease.
- Avoid harsh midday sun to prevent leaf burn.
For nursery saplings, the roots have now settled, and growth speeds up—plants will be 4–6 inches tall with healthy foliage. Switch to a deep watering routine, allowing soil to dry slightly between waterings.
 Week 4: First Harvest Time!
By week four, seedlings should be 2–4 inches tall with mature leaves—ready for a small harvest.
- Harvest only one-third of the plant using sharp scissors to avoid disturbing delicate roots.
- Remove weak seedlings to prevent nutrient competition.
- Increase sunlight exposure to 7+ hours per day.
- Apply a second round of diluted liquid fertilizer.
For nursery saplings, you’ll have dense foliage ready for frequent pinching or harvesting. Even if you’re not cooking with them yet, remove mature leaves and deadhead flowers to encourage more growth.

“By the end of the first month, you’ll feel like a mini farmer in your own home.”
📌 Final Thoughts: Your Herb Garden = Zero to Flavor Hero
Starting a herb garden doesn’t require special tools or a “green thumb”—just the right steps, patience, and a sprinkle of love. With these 5 easy steps, you can go from zero to flavour hero, enjoying fresh, homegrown herbs right from your balcony, windowsill, or backyard.
Growing herbs is not just about adding flavour to your food—it’s about building a small, thriving green space that boosts your mood, reduces kitchen costs, and connects you to nature.


Have you grown herbs before? Share your successes, flaws, and mistakes in the comments below. Your story could help a fellow gardener avoid common pitfalls and keep our container gardening community thriving.
 Herbs Don’t Need Fancy Care—Just the Basics
 Why Morning Watering is Best
 Don’t Overwater—Herbs Hate Soggy Roots
 1. Overwatering Herbs
 Week 4: First Harvest Time!
Pingback: How to Grow Fresh Leafy Greens in Containers – 5 Easy Home Gardening Tips - Not_So_Green_Thumb
Pingback: No-Fluff Guide to Container Gardening – Real Tips from 7 Years of Growing Experience
Pingback: Top 3 Essentials for Container Gardening Success: Sunlight, Space & Drainage Explained
Pingback: 6 Pots That Thrived for Me (and Cracks I’ll Never Forget)