7 Years, Countless Tools, and Plenty of Mistakes
In my 7 years of container gardening, the first 4 were clumsy, frustrating, and full of trial and error. But in the last 2–3 years, I’ve gained real clarity in my gardening journey. A big reason for this clarity has been my website and consistent blog writing.
Documenting my gardening experiences, journaling every step, and researching deeply about container gardening tools, potting mixes, and watering practices gave me a fresh perspective. Writing forced me to track my progress, declutter my unnecessary gardening needs, and reflect on my gardening mistakes—many of which I was blindfolded to earlier.
Just like any hobby, we start out fascinated—excited to try new things, buy endless tools, and experiment without much thought. But the moment it turns into a passion or career, things shift. The way we see tools, plants, and even mistakes becomes more refined.
My four years of gardening mistakes, regrets, and lessons have now become the backbone of my blogs. In this post, I’m going raw and honest about the tools I regret buying—and what I did instead to save both my green thumb and my wallet.
The truth is, container gardening doesn’t demand expensive, fancy tools. What truly matters is good garden care, smart choices, and investing only in quality gardening tools that last. I’ve touched on this before in my post about must-have container gardening tools, but here I want to go deeper.
It’s time to reveal my mistakes so you can avoid repeating them—and regret-proof your gardening journey.
Why More Tools Don’t Mean Better Gardening

If you’re into gardening—whether it’s a weekend hobby or a daily passion—you’ll probably relate to this: social media feeds overflowing with gardening influencers, endless lists of “must-have” tools, and product ads promising a perfect garden.
I’ve been there too. Many times, I bought products simply because someone suggested them—sometimes even plants—and ended up regretting it. But here’s the truth: I can’t entirely blame influencers. In fact, their videos and posts actually helped me when I was clueless in my early days. Some of their product suggestions worked well, and I’m still grateful for those.
But here’s the key: you don’t have to buy everything they suggest (even if I recommend it in my own blog!). Take a step back before hitting “buy.” Ask yourself:
- Does this product serve a real purpose in my garden?
- Will it make my gardening more efficient?
- Does it fit my space and plant needs?
If it ticks all those boxes, then it’s worth it.
How Marketing Creates Unrealistic “Perfect Garden” Expectations
So, do I need many tools for balcony gardening? The harsh reality is no. You don’t need a pile of tools to keep your plants healthy, clean, and thriving—you just need the right tools.
And let’s bust another myth: there’s no such thing as a perfect garden. In the early days, gardening was chaotic and messy—not for weeks or months, but for years. Even after seven years, I still feel clumsy with daily chores. My real goal as a container gardener with 60+ plants? To keep them alive, thriving, and resilient through unexpected heatwaves, heavy rains, or sudden seasonal changes.
For me, it’s always functionality over aesthetics. Sure, a beautiful Instagram-ready garden looks nice, but a healthy plant is the real reward. If you only chase aesthetics, you risk neglecting basic plant care. Worse, perfectionism in gardening creates unnecessary anxiety. You stop celebrating the small wins—like a new leaf, a healthy root system, or a plant surviving a tough season.
Instead, focus on building a perfect garden. Enjoy the little green moments, the growth you witness, and the joy of bringing nature into your space. Gardening isn’t about achieving an unrealistic “perfect” goal—it’s about being mindful, happy, and present in the process.
Essential vs. Non-Essential Gardening Tools
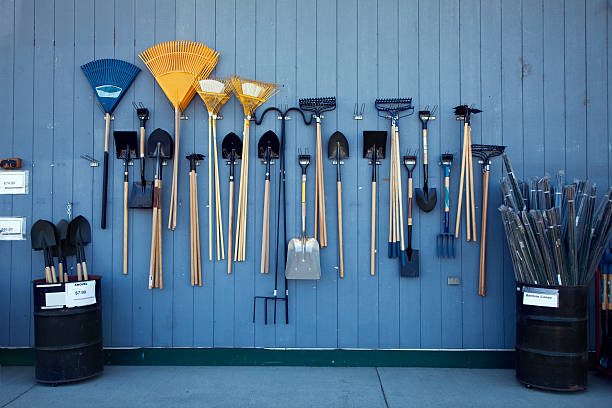
Over the years, I’ve shared affordable, essential gardening tools for container gardeners in my blog posts. They’re basic, functional, and honestly all you need to get started. If you’re going to spend money, do it piece by piece:
- Start with essential tools.
- Invest in good-quality plants.
- Learn about your plants before adding more to your collection.
It’s a blessing to have money for hobbies, but don’t waste it on fancy, branded tools that look good but don’t serve your garden. A good tool isn’t just a “chore reducer”—it can open doors to new phases of gardening and help you grow as a gardener.
But here’s the catch: if you skip the learning part and just buy products blindly, you’ll drain your energy, money, and time. And if the plants don’t show results, you might feel discouraged and give up. That’s why, especially in the early days, you should spend more time gardening and learning about plants rather than shopping for unnecessary tools.
My Biggest Tool Regrets (And What I Learned Instead)

I’ve got a huge list of failed products to share. Back when I started container gardening around 2018–2019, there weren’t as many gardening influencers and content creators as we see today. I mostly relied on a few YouTube gardening channels and blog articles to learn the basics.
But honestly, I was clueless—and mindlessly bought almost everything they suggested without proper research. Now, after seven years, I can clearly tell the difference between essential gardening tools and those that are not so useful.
That insight, however, came at a cost: spending way too much money on products that didn’t live up to their promise. Let’s revisit my experiences, so you don’t have to repeat the same mistakes.
Buying Excess Pots That Didn’t Fit My Space
My first gardening purchase—48 nursery pots online—was an absolute mess. At that time, I was so immersed in gardening blogs that I convinced myself I needed to start a full flower and vegetable garden from seeds.
Seeds were affordable, but I had zero knowledge about pot size for different plants or root growth patterns. Out of those seeds, only a few germinated properly. Most failed due to wrong care or planting in the wrong season.
I quickly realized that ordering bulk pots wasn’t useful. Today, I still use some of those pots here and there for seedlings, but the quantity was way too excessive.
Lesson learned: Plants need pot size upgrades based on their growth stage. Instead of bulk buying, I now purchase 2–4 pots at a time, test them out, and reorder only when I’m satisfied. And I never splurge on expensive, fancy pots—affordable pots for container gardening work just fine.
Expensive Readymade Potting Mix That Wasn’t Worth It
When I bought those nursery pots, I also learned that garden soil alone doesn’t work well for container plants. Back then, I wasn’t confident about making my own mix, so I bought a 10kg bag of readymade potting mix for ₹800.
The quality wasn’t bad, but the quantity was tiny compared to the cost. Today, I spend that same amount on amendments like cocopeat, compost, coconut husk chips, manure, organic fertilizers, perlite, and vermiculite—enough to last an entire season.
Lesson learned: Now, I never buy premixed soil. Instead, I prepare my own DIY potting mix for container gardening and store amendments in recycled buckets. This way, I can customize the soil based on plant needs—saving money and improving plant health.
Watering Spikes That Promised “No More Dry Soil”
Watering spikes were a mixed bag for me—useful in some cases but not a full solution. They drip water slowly, almost like mini drip irrigation for balcony plants, but you still need to refill bottles separately.
I bought 10 spikes and only used them for hanging pots or those placed in hard-to-reach corners. For a small collection, they’re fine, but for 50–60 pots, imagine replacing bottles every few days—it’s exhausting.
They also have downsides: in windy areas, smaller pots may topple under the weight of the water bottle. A 500ml bottle only lasts 4–5 days, depending on the season.
Lesson learned: If you have a minimal plant collection or often forget watering, spikes are okay. But they’ll never replace the efficiency of a simple watering can or bottom tray watering.
Cheap Plastic Pots That Cracked Too Soon
Not long ago, I fell for a “70% off” sale on grow bags and plastic pots. The price seemed too good to be true—and it was. Within months, the grow bags tore apart, and the plastic pots cracked at the rim, eventually breaking after a small topple.
The worst part? Those pots housed healthy plants. I had to quickly reorder durable pots for balcony gardening from a trusted seller, which blew that month’s budget and stressed me out.
Meanwhile, my six-year-old plastic pots are still fine—just faded in color.
Lesson learned: Spending ₹100 extra on a quality pot is better than buying cheap ones that break quickly and force you to double your spending later.
Decorative Ceramic Planters Without Drainage Holes
I once bought a set of ceramic planters from a local vendor on the highway. I assumed they would behave like clay pots—porous and breathable. Big mistake.
One planter had no drainage hole at all, and others had tiny holes that were clogged with hard water deposits. Within a week, my plants wilted due to root rot.
The pots looked aesthetic, but they weren’t functional. They were also expensive, hard to drill, and came in limited sizes.
Lesson learned: Ceramic planters without drainage holes may look stylish, but they’re impractical. If you must use them, treat them as cachepots and place functional grow bags or nursery pots inside.
Drip Irrigation Systems That Didn’t Work in Small Spaces
Before the pandemic, I tried installing a DIY drip irrigation system for terrace gardening. It was one of the toughest solo tasks I’ve ever attempted—I was completely drained.
Two years later, after a house renovation, I had to dismantle the entire setup. The kit still sits in storage because constant construction made it impossible to reinstall.
Lesson learned: Drip irrigation works best if you have a permanent setup, a nearby water tap, and ideally an extra pair of hands to help. For solo balcony gardeners, it’s not worth the struggle unless you’re fully committed.
(PS: I plan to set mine up again soon and will share the process on YouTube!)
Low-Quality Seeds That Never Sprouted
This regret took me longer to notice. At first, the seeds sprouted fine. But when I stored them for even a few weeks, germination rates dropped drastically.
Later, I learned why: most of those cheap seed packets were near expiry—essentially clearance stock. Buying from non-trusted sources made it worse, as many were already expired. I wasted time blaming my green thumb when the real problem was bad seed quality.
Lesson learned: Always buy seasonal vegetable seeds from trusted nurseries and check expiry dates. A few extra rupees for quality seeds will save you from disappointment and wasted effort.
My Budget-Friendly Fixes That Actually Worked

After wasting money on a bunch of regret tools, I slowly found my rhythm with container gardening. What worked for me wasn’t fancy gadgets or influencer-recommended products—it was simple, durable choices and a few DIY hacks that suited my Indian balcony gardening climate. Here’s what made the real difference:
Durable Tools Over Cheap Deals
Instead of falling for discounts, I started buying affordable gardening tools . A good-quality pruner, a sturdy watering can, and strong plastic pots or terracotta pots are worth the slightly higher price tag. These tools not only reduced repeat spending but also gave me peace of mind—no sudden cracks or broken handles when I needed them the most.
👉 Pro Tip: Don’t buy a full set at once. Add tools one by one, as your garden grows. This way, your money works harder, and you’ll actually use everything you buy.
DIY Potting Mix Instead of Expensive Bags
Buying ready-made potting mix drained my budget quickly. Now, I create my own DIY potting mix for small balcony gardens using cocopeat, compost, perlite, and sometimes rice husk or coconut husk chips. These ingredients are cheap, easy to store in buckets, and I can adjust the mix based on whether I’m growing leafy greens, flowers, or succulents.
Not only does this save me money, but my plants actually grow stronger in a mix I’ve customized for them.
Simple Watering Routines That Work Year-Round
Instead of depending on spikes or failed drip irrigation kits, I follow a DIY gardening hack for small spaces—bottom watering for small pots, and deep watering for bigger containers.
In the Indian summer heat, I water early morning and late evening to reduce evaporation. During monsoon, I move water-sensitive plants under shade or use trays to control excess water. In winter, I cut back watering to avoid root rot.
These seasonal tweaks made watering stress-free, without needing expensive gadgets.
Smart Swaps That Saved My Plants
- Using old paint buckets as storage for soil amendments.
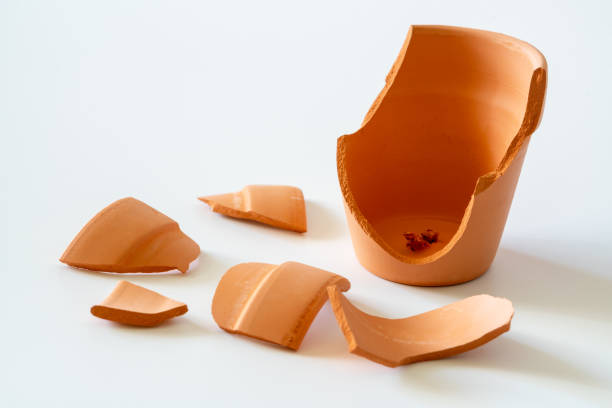
- Reusing broken terracotta pieces for drainage at the bottom of pots.
- Turning glass jars into mini greenhouses for delicate seedlings.
- Repurposing PET bottles for slow watering when I’m away for a few days.
These little hacks kept my garden thriving while keeping my wallet happy.
Key Takeaways for Beginner Container Gardeners
When I look back at my 7-year journey, one truth stands out: you don’t need every shiny tool on the shelf. What you really need is the right set of tools and practices that suit your space, your plants, and your local climate.
You Don’t Need Every Tool — Just the Right Ones for Your Space & Plants
As a beginner, it’s tempting to collect watering spikes, fancy sprayers, and overpriced pots. But in reality, container gardening for beginners in India can be as simple as starting with durable pots, a basic pruner, and a watering can. Fewer tools mean less clutter and more focus on nurturing plants.
Always Test Small Before Investing Big
Instead of buying bulk packs of seeds or investing in expensive readymade mixes, I learned to experiment in small batches first. This way, you see what thrives on your balcony or terrace before spending more. It saves money and reduces frustration.
Budget Hacks Last Longer Than Fancy Gimmicks
Over time, I discovered that gardening on a budget in small spaces doesn’t mean compromising results. DIY potting mixes, recycled containers, and simple watering routines lasted much longer than most “quick fix” tools I wasted money on.
Final Thoughts: Embracing Imperfect Gardening
If there’s one thing my 7 years of container gardening have taught me, it’s this: mistakes aren’t failures — they’re lessons. Every wrong tool, every wasted rupee, and every wilted plant pushed me closer to understanding what really works in my small-space garden. And honestly, that’s what makes gardening so much fun — it’s never about perfection, but about progress.
I’d love to hear from you: what’s your biggest “tool regret” or gardening mistake? Share it in the comments — your story might just save another gardener from the same slip-up.
👉 Want more practical tips for your plants?
- Read my blog on watering to learn simple routines that keep your container plants hydrated without overwatering.
- Check out my blog on pruning for easy techniques to keep your plants healthy and growing strong.
- Don’t miss my blog on soil mix, where I share DIY recipes and budget-friendly alternatives to expensive ready-made options.


