“Not all garden tools are created equal—after 7 years of container gardening, I’ve learned which pruners, trowels, and watering cans are truly worth your money and care.”
I’m not into the “perfect gardening tool” myth, because over 7 years of container gardening I bought plenty of tools—but only a few quality investments truly lasted with proper care. Even when tools are advertised as long-lasting or rust-free, their longevity really depends on how you use, clean, and store them.
Buying the cheapest gardening tools may feel like a win, but low-quality tools usually break, rust, or bend, forcing you to repurchase again. That’s wasted money and effort. For basic container gardening, you only need a simple gardening tool combo—pruners, a sturdy trowel, and a lightweight watering can. But with so many varieties in the market, it’s important to understand each tool’s purpose, how to choose wisely, and which features actually matter for small gardens.
In this blog, we’ll go through the best pruners, trowels, and watering cans for container gardening, how to choose them precisely, how to use them effectively, and how to keep them long-lasting. I’ll also share budget-friendly tips and suggest a few specific tools that enhance the container gardening experience—without overspending.
Why the Right Container Gardening Tools Make All the Difference
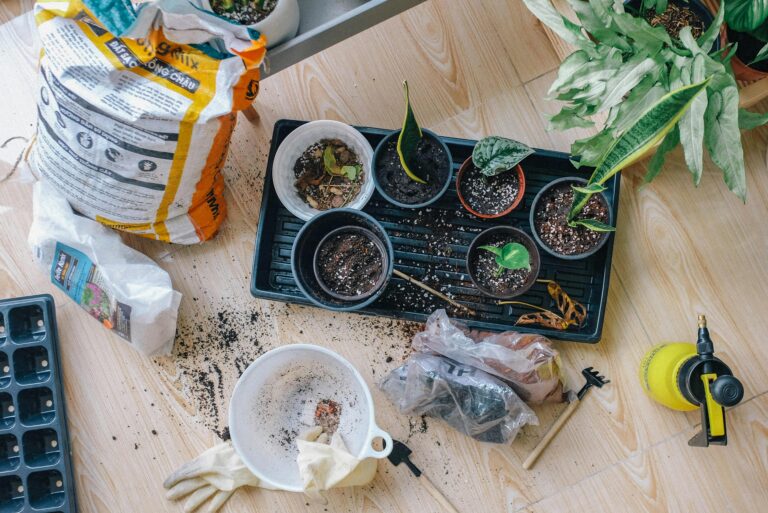
In my early gardening days, I didn’t have many tools. For almost a year after starting my container garden, I managed with regular ground-bed gardening tools. But once I got my first proper gardening tool—a simple trowel for container gardening—I realized how the right tool can cut down workload and make every garden task more precise.
Over the last 7 years of terrace container gardening, I’ve gradually upgraded my tool collection. As the number of plants grew, I found that the tools I needed became more specific. With time and experience, you’ll discover the exact gardening tools that fit your style and space.
Still, every beginner should start with a few basic gardening tools for pots and balcony plants. These essentials make up 90% of your routine: they keep your container garden neat, your plants healthy, and your space looking vibrant.
But here’s the key—choosing the right tool is as important as knowing which tool you need. Investing in durable, quality tools is a decision that pays off in the long run. Cheap, low-quality tools often rust, bend, or break, forcing you to replace them sooner. Instead, spend wisely on budget-friendly yet durable gardening tools that can handle daily use.
And remember, you don’t need expensive or fancy gadgets. The goal is not to collect tools, but to keep the right ones that support your green thumb. With just three basics—a good pruner, a sturdy trowel, and a practical watering can—you’ll be able to pot, plant, prune, harvest, transplant, and manage almost all container gardening tasks.
In the next section, I’ll share the 3 best tools every container gardener should own, based on my real 7-year experience.
My Go-To Pruners That Survived 5 Years of Container Gardening
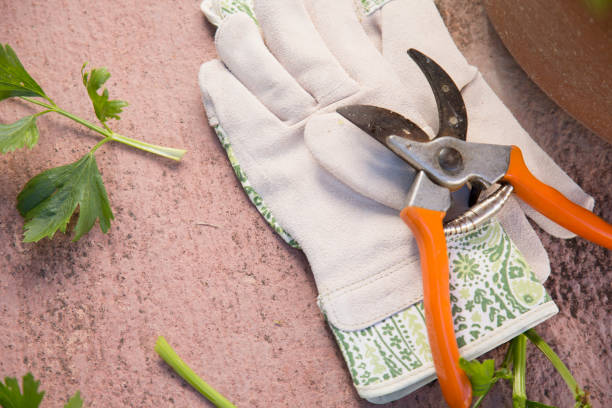
I first bought hand pruners for container gardening during the pandemic, when I was spending more time with my plants and reading about gardening techniques. An article about pruning made me connect the dots between my plant problems and the lack of the right tool.
So, I picked up a simple, budget-friendly pruner—and it completely changed my gardening journey. That one tool pushed me to start pruning routines, make precise cuts for propagation, and keep my plants cleaner and healthier.
Pruners are not just tools; they actually upgrade the gardener’s mindset. Once you start using them, you’ll understand how important it is to prune after the blooming season, or to remove diseased or pest-infested parts without harming the main stem. A good pruner makes cutting easy, clean, and stress-free for the plant.
With pruners, you can:
- Shape foliage plants neatly, avoiding an overgrown, messy look that hides pests.
- Reduce the risk of root-bound plants by trimming back foliage, allowing them to thrive longer in the same pot.
- Harvest herbs and flowers more cleanly.
- Collect seeds and take precise propagation cuttings, increasing your success rate.
Sometimes, I even trimmed the bottom roots of foliage plants with my pruners to delay repotting—because space and budget don’t always allow for endless pot upgrades. Done carefully, this helped me manage my plants without harm.
Having a quality pruner and knowing how to use it effectively is one of the best upgrades you can give yourself as a container gardener.
Hand Pruners vs. Shears – Which Do You Really Need?
For container gardening, you’ll need hand pruners for small plants in pots, not heavy garden shears. Shears are better suited for ground-bed gardens with thick stems and larger shrubs.
In pots, stems are delicate. Forcing shears can cause breakage instead of clean cuts. Hand pruners allow you to access tight spots, snip small nodes, and cut stems without damage. For extra precision, you can also try micro-tip pruning shears for balcony plants.
Personally, I still use the same basic pruner I bought years ago on a tight budget. If I ever upgrade, I’d choose a heavy-duty model made of Japanese steel garden pruners.
My Affordable Pruner Pick That Actually Lasted
I’m still using that same basic pruner—it’s been over 5 years, cost me less than ₹160, and it’s still going strong. It’s helped me keep plants well-maintained, remove diseased parts, harvest herbs and flowers, and improve my propagation success because the steel blades leave smooth cuts without damaging tissues.
If you have the budget, investing around ₹500 in a durable heavy-duty pruner is worth it. But if you’re just starting or gardening on a budget, my affordable pruner recommendation has proven itself over years of daily use .
Seasonal Pruning Lessons (What I Learned the Hard Way)
Pruning is powerful—but timing matters. Early on, I made the mistake of pruning in harsh weather: peak summer, heavy monsoon, or during windy spells. The plants were already stressed and cutting them only made things worse.
Here’s what I learned:
- Flowering plants: prune after the blooming season.
- Herbs: harvest monthly; if not, prune lower leaves and pinch off flowers to encourage leaf growth.
- Best season for pruning container plants: late winter, just before spring growth. This timing helps encourage fresh, healthy shoots as the weather warms.
After pruning, I always feed my plants lightly with organic fertilizer for container plants and keep them well-hydrated. Adding a spoon of Epsom salt for plant stress relief has also helped reduce transplant shock and pruning stress.
The Trowel That Never Failed Me (And Why Size Matters in Pots)
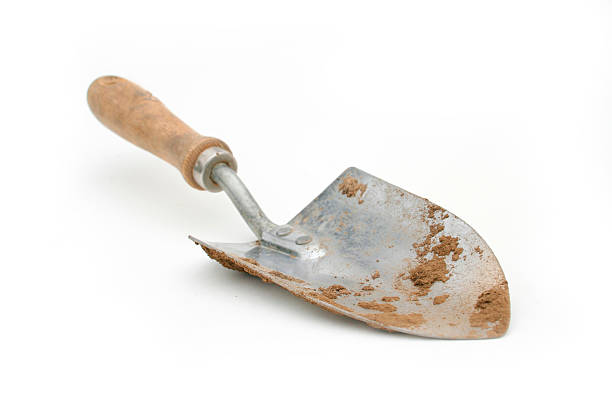
In container gardening, the right tools make your work easier and far more precise. When I started out, all I had was a simple trowel for pots and balcony gardening. It cost me less than ₹150 at the time, and now, 5–6 years later, the same model is around ₹200.
That first trowel did everything—mixing potting soil, filling containers, transplanting seedlings, loosening compact soil. But as my plant collection grew, one trowel wasn’t enough. My wide trowel worked well for larger pots (above 8 inches), but it struggled in smaller containers and seedling trays.
That’s when I invested in a hand gardening tool combo set that included a small trowel, a hand rake, and a hand fork. They may look simple, but together, they make container gardening tasks much easier and more precise.
Small vs. Wide Trowels – When to Use Each in Pots
Over time, I realized it’s worth having two different types of trowels:
- Wide heavy-duty trowel – Perfect for scooping potting mix, transplanting saplings into big pots, and mixing fertilizers. Works best for pots above 8 inches.
- Narrow or small trowel for seedling trays and mini pots – Ideal for pots under 6 inches, filling soil into tight spaces without spilling, carefully removing small plants, or applying fertilizer.
If you have a mix of pot sizes, having both types—or better, a budget-friendly gardening tool combo for small pots—saves time and keeps your plants safe.
How I Found a Budget Trowel That Didn’t Bend in Clay Soil
Luckily, my first trowel was a good-quality one, though it rusted quickly because I didn’t know how to care for it back then. Even so, it never bent or broke, even when I used it in clay-heavy soil. I eventually reordered the same model and also picked up a few more in different sizes to match my pots.
Here’s how I use them today:
- Wide and curved trowel: My all-in-one tool for scooping potting mix, transplanting, weeding, and loosening soil.
- Medium curved-edge trowel: Great for seedling trays and smaller pots, prevents soil spillage.
- Mini trowel from combo kit: Perfect for transplanting delicate seedlings, feeding fertilizers, and light soil aeration.
The best part? All of these cost me under ₹200 each. They’re affordable yet durable gardening tools that have stood the test of time.
Trowel Care Tips I Wish I Knew Earlier
The longevity of your trowel depends more on care than cost. Here’s what works for me now:
- Wash the trowel after each use and dry it immediately.
- Leave it in sunlight for 5 minutes to remove hidden moisture.
- Wipe the steel with a dry cloth or tissue.
- Store in a dry, shaded spot, and avoid scratching tools against each other.
These simple trowel maintenance tips for rust prevention keep the steel from corroding and make even budget-friendly tools last for years.
Watering Cans That Save Time and Water in Small Spaces
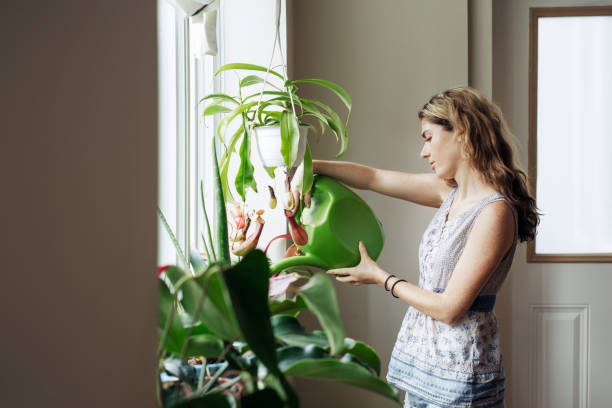
I have three different watering cans, each with a specific purpose. A 15-litre steel watering can is my choice for ground-bed gardening since I have a nearby water source and those plants need more water.
For my terrace garden, I’ve been using a 10-litre plastic watering can with a long spout since my very first day of container gardening — and it’s still going strong after years of daily use.
Recently, I added a 1.8-litre lightweight watering can with a long spout, perfect for new saplings in nursery pots and hanging baskets. This smaller size makes watering delicate plants easier, without straining my wrist or applying too much pressure.
If you have a nearby tap connection next to your pots, you can switch to a watering hose with adjustable spray nozzles for low-pressure watering. But if you don’t, then choosing the right watering can capacity depends on your plant count, how much weight you can carry, and how often you want to refill.
No matter what size you pick, always pay attention to the spout head design — it ensures gentle watering without disturbing the soil.
Why Big Watering Cans Don’t Work for Balcony Gardens
In small spaces like balcony gardens or vertical gardens, large watering cans can actually become a problem. Their weight strains your shoulders, and they often spill water when maneuvering through tight corners.
Over the years, I’ve experimented with different capacities: 5-litre watering can, 3-litre watering can, and 1.8-litre watering cans — all with long spout heads to reach tight spots.
If you don’t have a tap nearby, keep a small water drum or bucket close to your plants. Fill your watering can from it instead of walking back and forth to a distant tap.
Here’s a quick guide:
- For under 20 pots, a 5-litre can is enough with 4–5 trips.
- For lightweight convenience, stick with 1.8 litres and keep storage nearby.
- For fewer trips, go for 10 litres or more, but only if you can carry the weight comfortably.
If you grow hanging plants or wall planters, keep both a small and a medium watering handy to make watering easier.
The Affordable Watering Can I Still Use Daily
I’ve never been the kind of gardener who spends on fancy tools. I always look for affordable yet durable gardening tools.
One of my best buys was a 10-litre plastic watering can with a long spout. I purchased it about 7–8 years ago, and I’m still using it today. The key is proper care: clean it every few months, keep it empty when not in use, and store it in the shade to prevent damage.
Recently, I added a 1.8-litre watering can for hanging pots and seedlings. Plastic watering cans are my preferred choice for container gardening since they avoid the rust problems that come with metal cans.
Myth-Busting – Do Self-Watering Cans Really Work?
Many beginners ask me about self-watering cans and self-watering pots. From my experience, I don’t recommend them for most gardeners. Here’s why:
- Plants need watering routines that adjust with seasonal changes. Self-watering systems often keep soil consistently moist, which can cause root rot and overwatering issues.
- They still require maintenance — like refilling reservoirs and cleaning them every few months.
- They are expensive and not practical if you have many pots.
The only time self-watering pots are useful is if you’re a frequent traveler or have a very busy schedule. For most of us, it’s better to invest in a quality watering can for balcony gardening or terrace gardening and water plants when they need it.
The truth is simple: if you don’t have the time to care for plants, don’t buy them. Like pets or aquariums, plants require commitment, consistency, and care.
My 7-Year Container Gardening Lessons (Tools, Mistakes & Wins)
After seven years of container gardening, I’ve learned that tools can either make your gardening life easier or quietly waste your money. Here’s my honest wrap-up from experience:
Tools Worth Investing In
Some tools have proven themselves over and over again. A sturdy trowel with a strong steel blade, a long-spout watering can that fits your plant setup, and a hand fork or rake for loosening soil and a pruner to keep the plants neat and healthy are small investments that save time and effort. These are not just tools — they’re everyday companions that survive years of use if cared for properly. Buying a combo set of durable hand tools is one of the best decisions I made for container gardening.
Tools I Regret Buying
On the flip side, I’ve wasted money on flashy or “all-in-one” gadgets that promised too much. A few cheap plastic tools bent in clay soil within weeks. I also regret buying oversized metal watering cans for my small-space garden — they were heavy, spilled water everywhere, and ended up collecting dust. Lesson learned: don’t fall for gimmicks; stick with practical, durable, budget-friendly gardening tools.
Myth-Busting Takeaway
The biggest lesson? Gardening success doesn’t depend on having the perfect tools. You don’t need a premium set or the latest trending gadget. What matters is consistent care, proper watering, and knowing how to use the tools you already own. A simple trowel, when maintained, can outlast expensive gear.
At the end of the day, it’s not the cost or brand of your tools but how often and how carefully you use them. Container gardening thrives on commitment and consistency, not perfection.
FAQ on Container Gardening Tools
What are the best tools for container gardening beginners?
For beginners, you only need a basic gardening tool kit: a trowel for planting and soil mixing, a pair of hand pruners for trimming and propagation, and a watering can with a long spout for gentle watering. If you want to expand later, add a hand rake and hand fork to loosen soil and remove weeds. Start simple, then upgrade as your garden grows.
Do I really need expensive gardening tools for potted plants?
No — you don’t need expensive gear. A budget-friendly but durable tool set is enough for most potted plants. The truth is, even “rust-free” or “long-lasting” tools will wear out if you don’t clean and store them properly. Tool care matters more than price. Invest in quality where it counts (like pruners), but avoid flashy, overpriced tools that promise more than they deliver.
Which watering can is best for balcony plants?
For balcony or small-space gardens, choose a lightweight watering can with a long spout, ideally between 1.8 litre to 5 litres. Big cans (10–15 litres) are too heavy and spill easily in tight spaces. If you have hanging planters, keep one small can just for them. Look for heavy-duty plastic watering cans since they don’t rust and are easier to carry.
How do I maintain pruners and prevent rust?
After each use, wipe your pruners clean with a dry cloth or tissue. If they’re sticky with sap, use mild soap water to wash and dry them immediately. Store in a dry, shaded spot (not outdoors where they catch rain or dew). For extra care, you can apply a thin layer of oil on the blade once in a while. This simple routine keeps pruners sharp, rust-free, and long-lasting.
Can I use kitchen tools as gardening tools?
Yes, but only temporarily. A spoon can replace a mini trowel for seedlings, or kitchen scissors can snip herbs. But kitchen tools are not designed for soil or plant stems — they bend, rust, or dull quickly. If you’re serious about container gardening, invest in basic gardening tools. They’re designed for durability and precision, and they’ll make your work easier in the long run.
Final Thoughts – Choosing Tools That Fit Your Garden
After 7 years of container gardening, one lesson stands out: it’s not about collecting every “fancy” gardening tool — it’s about having the right tools for your space, plants, and budget. A good pair of pruners, a sturdy trowel, and a reliable watering can are enough to cover 90% of your daily garden tasks.
Remember, tools are an investment. Choose durable and quality tools, care for them after use, and they’ll reward you with years of service. Avoid chasing “perfect” tools — consistent use, proper storage, and maintenance are what truly extend tool life and improve your gardening experience.
🌱 Ready to take the next step?
👉 Check out my detailed guides on:
- Watering Practices That Save Plants & Time
- Pruning Tips for Healthier, Thriving Plants
- DIY Potting Mix Recipes That Actually Work
Your container garden will thank you for it.
💬 I’d love to hear from you!
What’s your go-to gardening tool that you can’t live without? Or maybe you’ve had a tool that didn’t live up to the promise? Share your experience in the comments below — your feedback not only helps me improve these blogs but also helps fellow gardeners choose wisely.