“If you want fresh, chemical-free food without relying on the market, growing leafy greens in containers at home is the quickest and healthiest way to fill your plate with nutrition.”
Leafy greens are not a big part of my gardening list most of the time, mainly because I live in a rural area surrounded by farming families. I usually buy vegetables and leafy greens directly from them right after harvest—especially from those who keep cattle and rely less on synthetic fertilisers.
But that doesn’t mean I’ve never grown leafy greens myself. I tried a few years back, exactly in 2020, during the pandemic. With grocery demand high and restrictions on buying from outside, my container garden became my main source of leafy greens. I grew them until the restrictions were lifted, and that experience taught me just how valuable they can be.
Why Fresh Leafy Greens in Containers Are Worth It
Leafy greens and herbs have similar growing patterns and care needs, and you don’t need fancy setups to develop them. Here’s the truth: if you restrict edible plants—whether fruits, vegetables, leafy greens, microgreens, or herbs—with unnecessary pruning or cram them into decorative pots, it only affects their growth.
Edible plants should be cultivated for their health benefits, not for aesthetic purposes. You don’t need expensive containers—invest your time and money in the products your plants truly need, like a good potting mix, organic fertiliser, and proper watering tools.
So why grow leafy greens at home? They’re fast-growing, low-maintenance plants with huge nutritional benefits. Leafy greens are rich in essential vitamins, minerals, and antioxidants that support your internal organ health.
From my experience, I grew plenty of leafy greens to help with my iron and vitamin deficiencies. Adding these greens to my diet improved my overall health—better skin, good gut health, and healthier hair. And when you grow them at home without chemical sprays, you preserve even more nutrients.
If you’re into fitness or self-care, leafy greens are your best friend—easy to grow, quick to harvest, and full of life-giving nutrients.
Choosing the Right Leafy Greens for Container Gardening
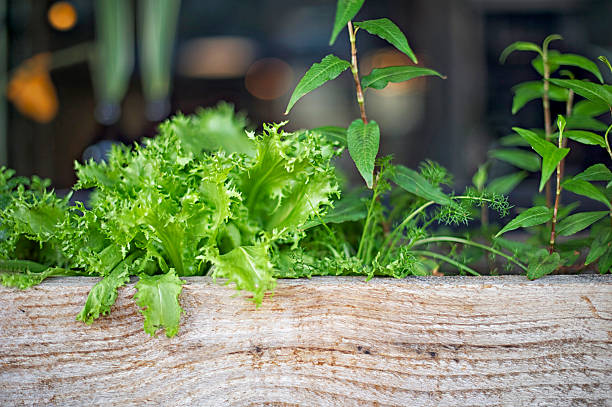
Choosing the right plant reduces the workload, chaos, and extra care in container gardening. What “right plant” means is simple—choose a plant that can thrive in your local climate and adapt to year-round seasonal changes in your region.
If you live in a mostly hot-weather location, go for heat-tolerant leafy greens that can handle intense sunlight and warm temperatures. If you’re in a high-humidity, frequent-rainfall area, choosing pest-resistant and disease-tolerant leafy greens will save you from constant maintenance.
Once you’ve picked plants suited to your climate, the next step is finding the perfect sunlight spot for them in your container garden. If your space doesn’t get the required hours of light for a particular plant, it’s better—especially for beginners—to skip it for now. This helps you avoid light stress in leafy greens and ensures a healthy harvest.
To help you get started, here are some beginner-friendly leafy greens that are easy to grow in containers. These plants need only basic care, adapt well to most conditions, and give you the confidence to try more of your favourite varieties as you gain container gardening experience.
Spinach:
Spinach is a cool-season leafy green that thrives in partial shade with about 3–4 hours of indirect sunlight. It prefers cooler temperatures and can bolt quickly in heat, so early spring and fall are the best planting seasons. Rich in iron, vitamin C, and folate, spinach is perfect for boosting energy and improving skin health. It grows quickly from seeds, and you can harvest baby leaves in just a few weeks.
Kale:
Kale is a hardy, cold-tolerant leafy green that does well in partial shade to full sun, needing at least 4–5 hours of light daily. Varieties like curly kale, Lacinato (dinosaur kale), and red Russian add both texture and nutrition to your garden. Packed with vitamins A, C, and K, as well as antioxidants, kale is known for supporting immunity and bone health. Best grown in cooler months—spring and fall—kale gets sweeter after a light frost.
Swiss Chard:
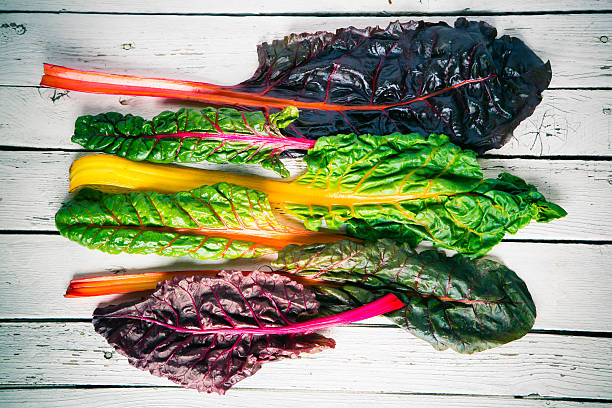
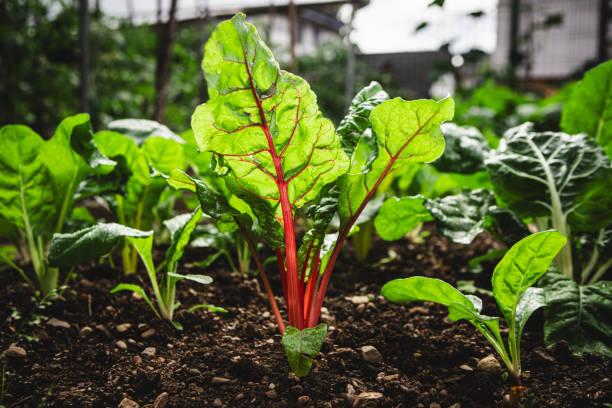
Swiss chard is a versatile, heat-tolerant leafy green that can grow in partial shade, handling about 3–5 hours of sunlight. With its colourful stems in red, yellow, and white, it adds beauty to container gardens. High in magnesium, potassium, and vitamin K, it supports heart and bone health. You can start it from seeds almost year-round in mild climates, and it offers continuous harvest with a cut-and-come-again approach.
Arugula:
Arugula, also called rocket, thrives in partial shade with 3–4 hours of indirect light. It grows fast, making it an ideal choice for quick harvests in 4–6 weeks. Known for its peppery flavour, arugula is high in calcium, vitamin K, and antioxidants. Best sown in early spring and fall, it prefers cooler weather for tender, non-bitter leaves. Direct seeding works best, and frequent harvesting encourages fresh regrowth.
Bok Choy:
Bok choy, a mild Asian leafy green, prefers partial shade and cooler temperatures, needing about 3–5 hours of gentle sunlight. It’s rich in vitamin C, vitamin K, and folate, with crisp stems and tender leaves perfect for stir-fries and soups. Best grown in spring or fall, bok choy matures quickly from seeds in 45–60 days. Baby bok choy can be harvested even earlier for a sweeter flavour.
Mustard Greens:
Mustard greens are heat-tolerant but grow best in partial shade with 3–4 hours of indirect sunlight. Spicy and nutrient-packed, they’re high in vitamin A, vitamin K, and antioxidants. They grow fast from seeds and can be sown in early spring or late summer for fall harvests. Regular picking of young leaves helps keep the flavour mild and encourages continuous growth.
Collard Greens:
Collard greens are resilient, cool-weather plants that do well in partial shade or full sun, with 4–5 hours of light daily. Rich in fiber, vitamin C, and calcium, they’re ideal for hearty, nutrient-rich meals. Best planted in early spring or late summer, collards can withstand light frosts, which improve their flavour. Continuous harvesting of outer leaves keeps the plant productive for months.
Container & Pot Selection – Bigger Isn’t Always Better
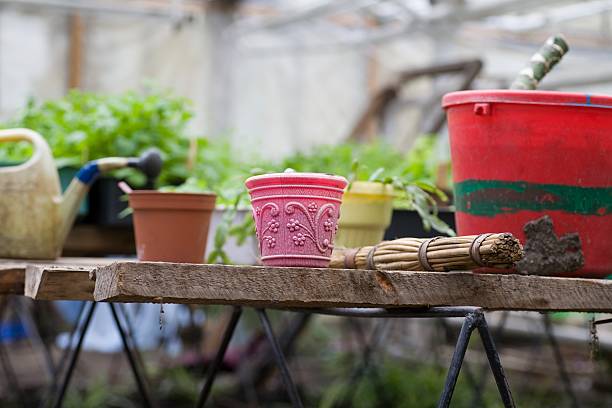
Busting the Myth
“Bigger pots always mean bigger harvests” — that’s the myth that haunted me in my early container gardening days. And you know what I got for believing it? Wilted plants, overwatering problems, pest and disease issues, and even nutrient burn from over-fertilising.
The right pot size for any plant is usually about 2 inches bigger than the root ball size. You can always upgrade the pot once the plant is growing well—there’s no rush.
Drainage Matters More Than Size
No matter the pot material, proper drainage for container gardening is non-negotiable. This can be drainage holes or a double-pot method. Pair that with well-draining soil so excess water doesn’t harm the roots.
Leafy greens are edible foliage plants, so they need consistently moist soil—but they are less tolerant of soggy soil. Prepare your leafy greens potting mix with this in mind.
Best Pot Materials for Leafy Greens
Pot materials play a crucial role in aeration and temperature of the potting mix, If possible, choose terracotta pots or fabric grow bags because they’re naturally aerated. Concrete and ceramic pots offer similar benefits, though slightly less breathable.
If you use plastic pots, metal planters, or plastic grow bags:
- Add extra drainage holes
- Water only when the topsoil feels dry
- Add a drainage layer at the bottom (broken terracotta pieces, gravel, coconut husk chips)
- Elevate the pot base to improve drainage
Choosing the Right Size for Different Leafy Greens
Deep-Rooted Greens
Kale, Swiss chard, collard greens, mustard greens
- Need deep pots at least 12 inch pots.
- Seeds can be sown directly into large pots with multiple seedlings
- If starting in seed trays, transplant to a pot 2 inches bigger than the root ball, then move to a larger pot once mature leaves appear
Shallow-Rooted Greens
Lettuce, spinach, arugula, bok choy
- Prefer wider containers like rectangular pots or window box planters for maximum harvest
- Round pots of 6-inch pots or 8-inch pots work fine for seedlings
- Upgrade when you see roots at the bottom—signs of root-bound plants
- Need frequent watering; keep soil moist but not soggy
- Less drought-tolerant; do best in partial shade with less intense sun
Intermediate Root Systems
Beet greens, turnip greens
- A combination of shallow and deep roots
- 8-inch pots or 10-inch pots work well
- Keep soil evenly moist, ensure good drainage
- Moderate sunlight—neither full sun lovers nor deep shade plants
Budget-Friendly Pot Options
From my 7 years of container gardening, I’ve found plenty of low-cost ways to grow leafy greens:
- Repurposed containers like old baskets, crates, and half-cut water storage drums
- Smaller options: recycled food containers, old kitchen jars
- For non-aerated materials (plastic, glass, metal), drill extra drainage holes or use a double-pot method
If you’re willing to spend a little, terracotta pots from local nurseries are a great investment. Plastic pots are widely available online and affordable—but improve drainage with:
- More holes
- A well-draining potting mix
- A drainage layer at the bottom (broken terracotta, gravel, coconut husk chips)

The Best Soil & Fertilizer Guide for Growing Healthy Leafy Greens in Containers
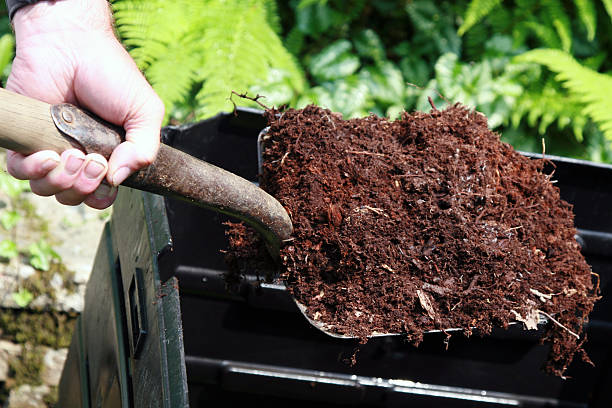
The soil or potting mix is the foundation of your container garden—it’s the mini ecosystem your potted plants depend on for survival. For leafy greens, the right potting mix isn’t just important—it’s the key to lush, nutrient-rich harvests.
Leafy greens and herbs share similar growth habits and soil needs. They thrive in moist, well-draining soil that holds enough hydration without becoming waterlogged. Soggy soil suffocates roots and invites fungal problems, so selecting the right soil amendments is crucial for long-term success.
My Personal Potting Mix Failures (and Lessons Learned)
In my early container gardening days, I assumed garden soil that worked in my garden bed would do equally well in pots. Big mistake. I lost plenty of plants, and here’s why:
- Compaction – Garden soil in containers compacts quickly from frequent watering, making it hard for roots to penetrate. This leads to slow growth and wilting.
- Contaminants – Unsterilized garden soil often contains weed seeds, pest eggs, and soil-borne pathogens, which can harm delicate seedlings.
- Poor Aeration – Heavy soil limits airflow around roots, causing stunted growth.
I then swung to the opposite extreme—using a completely soilless mix for leafy greens. That also didn’t work well. The breakthrough came when I found a balanced DIY potting mix that combined the benefits of garden soil and lightweight, moisture-retentive materials.
My Go-To DIY Potting Mix for Leafy Greens
- 30% Sterilised garden soil (free from debris and pathogens)
- 30% Cocopeat – Holds moisture and improves aeration
- 20% Well-aged compost
- 15% Aeration materials (coarse sand or perlite with vermiculite)
- 5% Organic fertilizer blend with neem cake powder
Pro tip: If you’re using non-porous pots, add a layer of coconut husk at the bottom for extra drainage.
Fertilising by Growth Stage
1. Sprouting Stage (Seed Germination)
Use a mild liquid feed at a 1:10 dilution ratio to avoid seedling burn. The best choices:
- Seaweed extract
- Compost tea
- Worm casting
- Fish hydrolysate
Tip: Use bottom-watering in seed trays to let plants absorb nutrients safely.
2. Early Growth (Seedling Stage)
Boost vegetative growth with:
- Diluted fish emulsion
- Alfalfa meal
- Kelp meal
Apply every 10 days at 1:10 dilution.
3. Vegetative Growth (Pre-Harvest)
Reduce nitrogen-heavy feeds to prevent bitterness. Use:
- Blood meal
- Feather meal
- Bat guano
- Diluted compost tea
Apply every 2–3 weeks.
4. Maintenance & Successive Harvests
For cut-and-come-again harvesting, trim ⅔ of the plant and reboost with:
- Worm casting top-dress
- Seaweed liquid feed
- Compost top-up
If harvesting the entire plant, moisten the soil first, then pull gently with a hand fork.
The secret to thriving leafy greens in containers is a well-balanced potting mix and thoughtful organic feeding. Healthy soil equals healthy greens—and a healthier you.
Watering & Sunlight – Finding the Balance for Leafy Greens in Containers
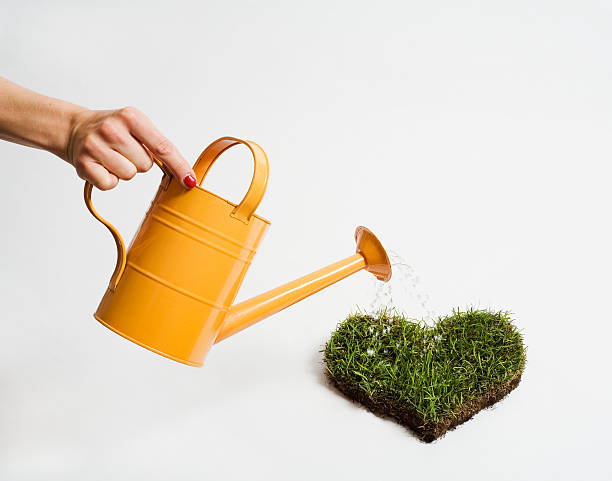
Myth: “Leafy greens need constant watering” → Truth: Too much water can cause root rot in potted leafy greens.
Overwatering is one of the quickest ways to kill your container-grown leafy greens. Leafy edibles like leafy greens, microgreens, and culinary herbs prefer soil that’s consistently moist—but never waterlogged. Most leafy greens have shallow roots and tender, non-waxy leaves, making them prone to dehydration, but also highly sensitive to soggy soil.
When excess moisture fills the air pockets in the container garden potting mix, it blocks oxygen flow, leading to root rot, fungal diseases, and plant wilting. The golden rule: Water only when your plants are thirsty.
How to Check Soil Moisture Before Watering
The finger soil test is the easiest method. Touch the top layer of the potting mix—
- If it feels dry, water your leafy greens.
- If it feels moist and sticks to your finger, hold off on watering.
You can also use the stick method—insert a wooden stick into the soil, and check for moisture.


Low Sunlight Solutions for Healthy Leafy Greens
Light needs vary depending on the type of leafy green. Container-grown lettuce, spinach, kale, and arugula may thrive in partial shade, while basil and Swiss chard love more sun.
- Full-sun leafy greens → Need 5–6 hours of sunlight, preferably early morning to before 11 AM. Avoid intense afternoon heat.
- Partial-shade greens → 4–5 hours of indirect sunlight; ideal spots include east-facing balconies or bright patios.
- Shade-tolerant greens → 3–4 hours of soft morning sunlight, such as near a north-east window or shaded terrace corner.
Light Optimisation Tips for Container Gardening
- Rotate pots every few weeks for even sunlight exposure.
- Use reflective surfaces (white walls, mirrors) to boost light in shaded spots.
- In hot climates, protect delicate greens from leaf scorch with shade nets or breathable fabric covers.
With the right balance of watering and sunlight, your leafy greens will not only survive but thrive in your container garden—giving you crisp, fresh harvests without the stress of constant plant care.
Common Problems & How I Solved Them
Container gardening can come with its own set of challenges, particularly when it comes to growing leafy greens in pots with limited space. While using organic methods presents its own difficulties, it also offers the advantage of cultivating healthy food for your diet without the use of chemicals. Additionally, it allows you to utilize small spaces to grow nutritious plants.
By closely monitoring your plants for early signs of problems, you can address these issues effectively and improve your gardening experience. I’d like to share my experiences in hopes that they can assist you in your own gardening journey.
Yellowing Leaves in Leafy Greens – Patterns & What They Mean
Yellow leaves on your container-grown leafy greens are more than just an eyesore—they’re your plant’s way of telling you something’s wrong. By paying attention to yellowing patterns, you can often figure out the problem before it gets worse.
 Lower Leaves Turning Yellow First
Possible Cause: Nitrogen deficiency.
Leafy greens like spinach, lettuce, and kale need steady nitrogen for lush green growth. If the plant can’t get enough from the soil, it starts pulling nitrogen from older leaves to support new growth—turning the bottom leaves pale yellow.
Fix: Feed with a balanced organic fertiliser or a nitrogen-rich liquid feed like diluted fish emulsion or compost tea.
 Yellowing Between the Veins (Leaves Stay Green Along the Veins)
Possible Cause: Magnesium or iron deficiency.
This “interveinal chlorosis” can be common in container gardens where nutrients wash out quickly.
Fix: Use a liquid seaweed spray or Epsom salt solution for magnesium, and an iron chelate for iron deficiency.
 Yellow Tips & Edges Browning Later
Possible Cause: Overwatering or poor drainage.
When roots sit in soggy potting mix, they can’t take in oxygen or nutrients properly, leading to yellow tips that later turn brown.
Fix: Check drainage holes, loosen compacted potting mix, and water only when the top of the soil feels slightly dry.
 Yellowing All Over at Once
Possible Cause: Heat stress or sunlight damage.
Leafy greens prefer cooler temperatures and consistent moisture. In extreme heat, leaves can fade from green to yellow quickly.
Fix: Move pots to morning-sun-only spots, use shade nets in summer, and keep the soil consistently moist (not wet).
 Pale Yellow, Small New Leaves
Possible Cause: Root-bound or pot size too small.
In containers, roots can quickly run out of space, restricting nutrient uptake.
Fix: Repot into a larger container with fresh nutrient-rich potting mix.
Bitter Taste in Spinach or Lettuce – Heat Stress & Bolting
If your homegrown spinach or lettuce tastes unusually bitter, it’s often a sign of heat stress or bolting. Bolting happens when plants send up a flower stalk early, usually triggered by rising temperatures or long daylight hours. Once this happens, the leaves turn tougher and the flavour shifts from sweet to bitter.
Prevention Tips:
Plant heat-tolerant lettuce or spinach varieties if you live in a warm climate.
Keep containers in morning-sun-only spots during summer.
Use shade nets to reduce midday heat exposure.
Harvest leaves regularly before plants show signs of a flower stalk.
Pest Control for Leafy Greens Without Harsh Chemicals
Chemical pesticides can ruin the flavour and safety of your container-grown leafy greens, so stick to gentle, plant-safe methods:
Natural Pest Solutions:
Neem oil spray: Effective against aphids, whiteflies, and leaf miners. Spray in the early morning or late evening.
Soap spray: A mild liquid soap solution helps control soft-bodied pests like aphids and mites.
Companion planting: Grow marigolds, basil, or garlic near your leafy greens to repel common pests naturally.
These methods are safe for both you and beneficial insects, while keeping your harvest healthy and chemical-free.
How to Use the “Cut-and-Come-Again” Method
For continuous harvests from your container garden, the “cut-and-come-again” method is your best friend. Instead of pulling the whole plant, trim only the outer, mature leaves with clean scissors, leaving the centre growth intact. This allows plants like lettuce, spinach, kale, and Swiss chard to keep producing new leaves for weeks—sometimes months.
Tips for Success:
Harvest in the cool morning hours when leaves are crisp and hydrated.
Never cut more than one-third of the plant at a time to avoid stressing it.
Harvest Timing to Avoid Bitterness
Leafy greens can turn bitter if left too long before harvesting, especially in warm weather. For the sweetest flavor:
- Pick baby leaves at 3–4 inches tall for salads.
- Harvest mature leaves before plants bolt (send up a flower stalk).
- In hot climates, gather leaves more frequently to outrun heat stress.
Storing Leafy Greens Fresh Without Refrigeration Loss
To keep your freshly harvested greens crisp and nutrient-rich:
- Rinse gently in cool water to remove dirt and pests.
- Wrap in a slightly damp cotton cloth or paper towel.
- Store in an airtight container in the refrigerator’s crisper drawer.
- If no fridge is available, place wrapped greens in a cool, shaded spot and use within 12–24 hours.
Pro tip: Avoid sealing greens in plastic bags without airflow—they wilt faster due to trapped moisture.
Seasonal Care Tips for Leafy Greens in Containers
There’s some seasonal alternation in plant care as the weather shifts, and this isn’t just about the calendar—it’s about your local climate conditions. If you live in a hot region, follow heat-tolerant care tips. If you’re in a humid or rainy climate, your monsoon care routine applies.
Beyond seasonal tweaks, some basic care practices stay the same year-round:
Regularly check for pests and diseases.
Avoid overcrowding your pots to improve airflow.
Don’t overdo nitrogen fertilizers—too much encourages leafy growth but weakens plants.
Maintain good drainage to prevent root rot.
Growing in Hot Climates – Mulching & Shade Are Key
In scorching weather, mulching your containers with dry leaves, coco husk, or straw helps retain soil moisture and keeps roots cooler. Position pots so they get morning sun but are shielded from the harsh afternoon rays using shade nets or nearby taller plants.
Growing in Monsoon – Drainage is King
During heavy rains, waterlogged soil is your leafy greens’ worst enemy. Ensure pots have enough drainage holes and slightly elevate them to prevent standing water. Avoid watering during prolonged rainy spells, and inspect roots for early signs of rot.
👉 Read my blog on post-monsoon plant care tips for container gardens to help your plants recover and thrive after the rains.
Growing in Winter – Protect from Frost & Cold Winds
In cooler months, leafy greens still thrive, but sudden frost and cold winds can damage tender leaves. Move pots to a sunny, sheltered spot, preferably near a wall for warmth. If frost is expected, cover plants with frost cloth or plastic sheets overnight.
Recommended Tools & Supplies I Personally Use
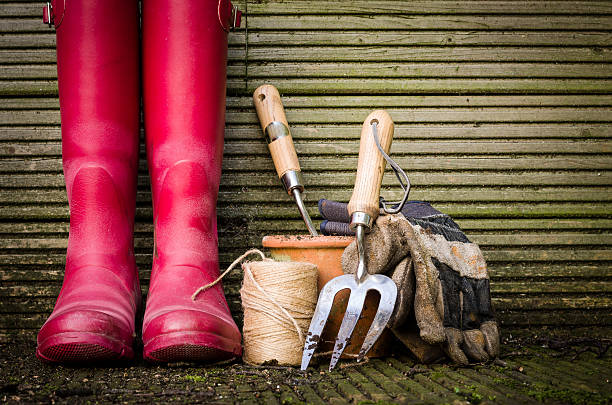
You don’t need fancy gear to grow leafy greens in containers—just a few basic gardening tools and supplies to make the process smoother. Most of the essentials have already been mentioned in the potting mix and container suggestions above.
Here’s my go-to toolkit for healthy, thriving leafy greens:
- Watering can with a spout – Allows gentle, low-pressure watering to avoid damaging delicate leaves.
- Basic container gardening tool set – Includes a small trowel, hand fork, mini rake, pruners, and gardening gloves for everyday care.
- Gardening mat – Perfect for repotting or mixing soil without making a mess indoors or on your balcony.
- Hand pump sprayer – For applying liquid fertilizers and natural pest control sprays like neem oil or soapy water.
- Lightweight shade net – Optional but useful in summer to protect greens from harsh sunlight.
These simple, budget-friendly tools will cover 90% of your needs for growing leafy greens in pots—especially if you’re just starting your container gardening journey.
🌿 Final Thoughts – Start Small, Stay Consistent
You don’t need a perfect container garden—you just need to start. Even one pot of fresh leafy greens can boost your confidence and give you a taste of homegrown freshness. In just 20–30 days, you can enjoy your first harvest right from your balcony, terrace, or windowsill.
Start with something beginner-friendly like spinach, lettuce, or fenugreek, and focus on consistent watering, proper sunlight, and pest-free growth. The small daily care you give will reward you with crisp, flavorful greens and a sense of accomplishment that no store-bought vegetable can match.
If you’re ready to explore more, check out my other container gardening guides:
- Choosing the Right Potting Mix for Healthy Plants
- How to Pick the Best Pots for Your Garden Space
- Beginner’s Guide to Organic Liquid Fertilisers
Your homegrown leafy greens journey doesn’t need to be complicated—just consistent. Start today, and your future salads will thank you.

 Lower Leaves Turning Yellow First
 Yellowing Between the Veins (Leaves Stay Green Along the Veins)
 Yellow Tips & Edges Browning Later
 Yellowing All Over at Once
 Pale Yellow, Small New Leaves