Why Do Healthy Potted Plants Suddenly Decline? Spot Disease Signs Early Before It’s Too Late
Even experienced container gardeners lose plants sometimes. You can’t be perfect in everything, especially in gardening. Whether it’s your profession or a deep passion, mistakes in container gardening can still happen. We might overlook or misread early signs of plant disease, mistaking them for nutrient deficiency, overwatering, or heat stress.
Climate change effects on potted plants are real—sudden weather shifts, extreme sunlight, or unexpected rains can weaken your plants. Sometimes, you’re just caught up in personal work and miss the signs. But remember this: there’s no guilt in losing a plant. What matters is what you learn from it.
By understanding early disease symptoms and following some simple precautions, we can prevent most diseases and learn how to treat affected plants the right way. So, let’s dig in and equip ourselves better.
A perfect garden doesn’t exist—even with the best organic soil mixes, daily care, sunlight optimisation, and neem oil sprays, pests and diseases may still show up. But with consistent plant care routines and proper monitoring, the chances of severe plant loss reduce drastically. You can’t always have a flawless garden, but you can have a functional and healthy container garden with the right knowledge.
Why does this blog help?
With the help of this blog, you’ll learn to:
- Spot early fungal and bacterial disease signs in your potted plants
- Alter daily care practices to avoid future disease attacks
- Treat affected plants with natural plant disease remedies
- Care for the plant after recovery to ensure it thrives again
Most of what I’m sharing here comes from my own hands-on experience—losing a few plants, saving others, and figuring things out over 7 years of growing plants in containers. These real lessons now help me keep my garden healthier and less prone to disease.
Let’s get your terrace or balcony garden thriving again, with fewer diseases and stronger plants.
🚩 Yellowing Leaves: Nutrient Deficiency or Disease?
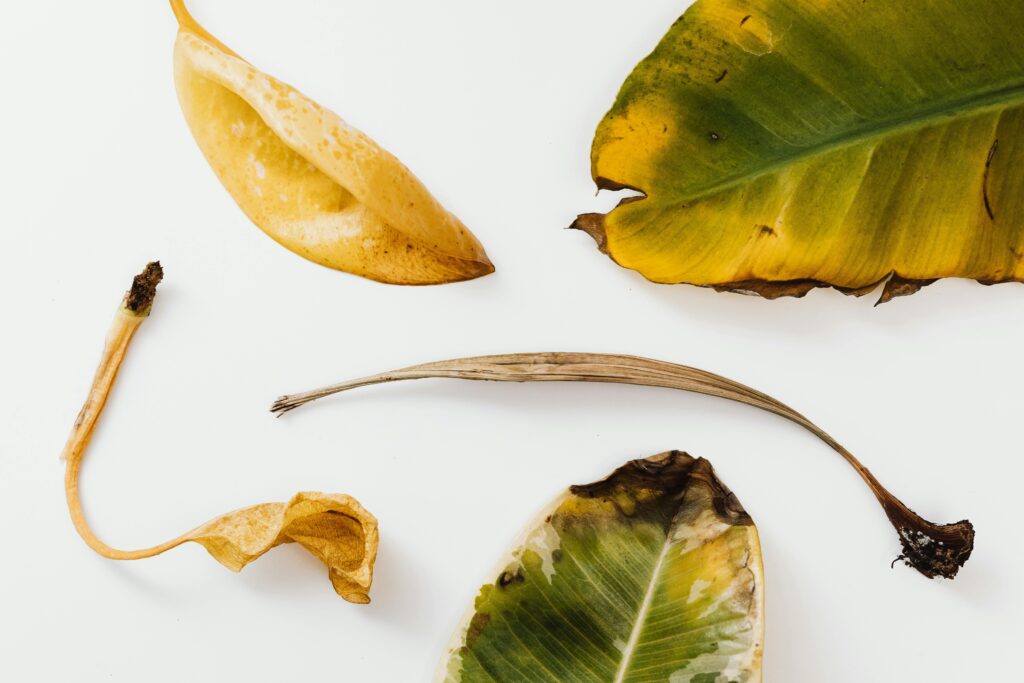
What might yellow leaves mean?
Yellowing leaves are one of the most common yet confusing issues in container gardening. They can indicate a wide range of plant problems: overwatering, underwatering, nutrient deficiency, poor drainage, compacted soil, lack of sunlight, too much direct sunlight, temperature stress, pests, plant diseases, or sometimes just normal ageing of leaves.
These yellow leaves often confuse even experienced gardeners. To tell them apart in real-time, close observation is key. When it’s a disease causing the yellowing, spotting the exact pattern on the leaves can help identify the issue. For this, having a magnifying glass for garden diagnosis can be helpful.
Here are some signs that yellowing leaves are caused by plant diseases in pots:
- Mosaic or mottled yellow patterns may point to a viral infection.
- Yellow rings or concentric circles are signs of a disease-based leaf yellowing.
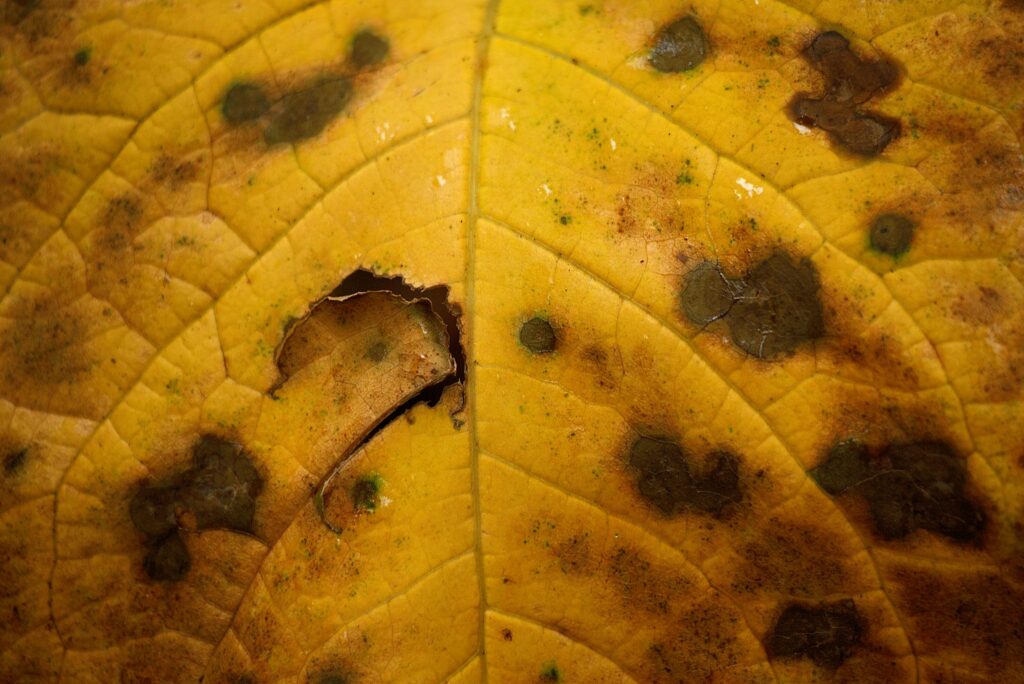
- If yellow leaves have brown or black spots surrounded by a yellow halo, it’s usually a fungal or bacterial leaf spot.
- Yellowing with wilting often points to root rot, a serious soil-borne disease in potted plants.
- If leaves are yellowing along with stunted or twisted growth, it’s likely a systemic virus infection.
- A powdery white or grey coating on yellowing leaves indicates powdery mildew.
- If you notice fuzzy mold growing on the potting soil along with yellowing, it’s likely a fungal soil infection.
- Sticky residue or webbing on yellowing leaves is a clear sign of pest infestation, and many pests carry diseases that spread across plants.
What to Do When It’s a Disease?
If you suspect the yellowing is due to a disease, act fast.
- Isolate the affected plant immediately to prevent the spread to nearby pots or planters.
- Wear disposable gloves to inspect the plant thoroughly, especially the roots and lower stems.
- Check the roots:
- If they are white and firm, the disease might not have spread much.
- If they are brown, mushy, or smell foul, the root system is already infected.
- Gently remove the soil and rinse the roots. Soak the plant in a diluted 3% hydrogen peroxide solution (use mild strength).
- Dispose of the infected potting mix in the trash—don’t reuse or compost it, even if sterilised. It’s not worth the risk.
- Keep the plant in quarantine and use separate tools for treatment. Sanitise your tools afterwards with alcohol or boiling water.
- This is the first aid step to stop disease spread and begin plant recovery.
In the upcoming sections, I’ll walk you through common potted plant diseases and how to treat each of them effectively based on what worked in my garden.
🦠 White Powder on Leaves: Powdery Mildew in Container Plants
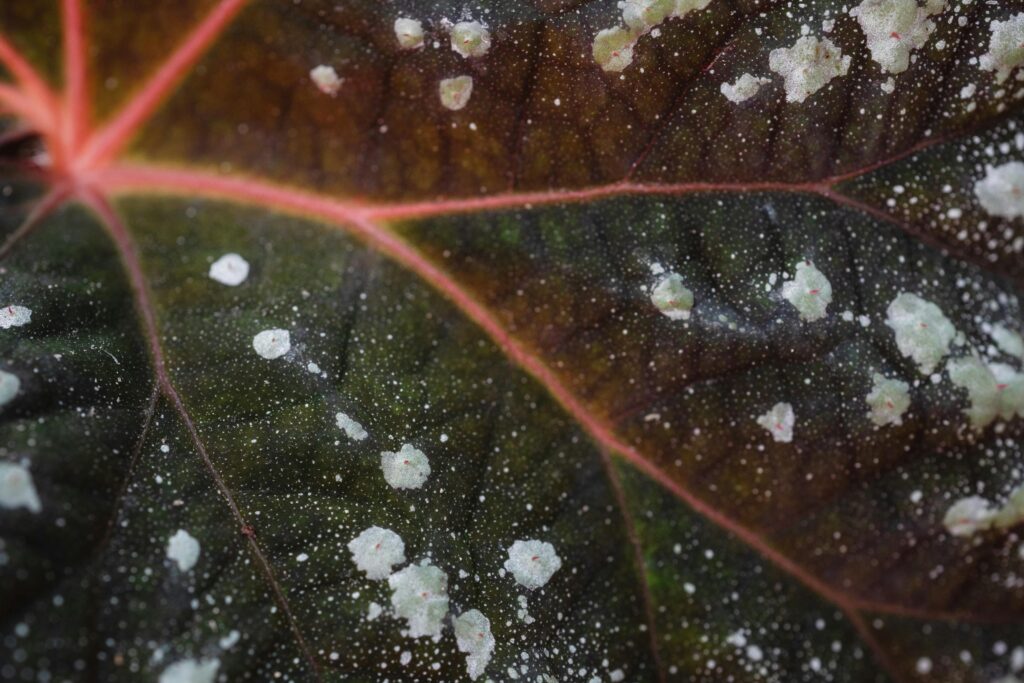
You might notice white powdery layers on the leaves of wilting plants—a classic sign of powdery mildew. I deal with this often in my chrysanthemum pots, especially during humid spells. Powdery mildew is a fungal disease that spreads quickly when left unnoticed, especially in warm, humid weather with poor air circulation.
Even at 50–60% humidity, this fungus thrives and dries out the leaves once infected. Low-light growing conditions, overcrowded plants, and general plant stress also make your garden vulnerable to powdery mildew.
Why Does Powdery Mildew Happen?
- Powdery mildew can spread through wind, contaminated soil, infected tools, or reused pots.
- Often, new nursery saplings unknowingly carry fungal infections. So always inspect plants before introducing them to your container garden.
- Stressed or nutrient-deficient plants catch fungal infections faster and tend to spread them more easily.
- Overuse of nitrogen-rich fertilizers leads to rapid leafy growth, which becomes a welcome mat for fungi.
- Crowded pots or containers placed too closely block airflow, encouraging mildew to multiply.
Although succulents are more resistant, this fungal infection commonly targets flowering plants, indoor plants, and herbs.
Early Signs of Powdery Mildew in Potted Plants
- White or grey powdery spots on the upper leaf surface
- Leaves turning yellow and curling, often with a dusty look
- Stunted growth or sudden wilting, especially in herbs and flowers
If you catch it early, pinch off affected leaves and dispose of them properly.
Prevention Tips for Powdery Mildew
- Avoid overcrowding plants in one container or small space
- Ensure good air circulation between pots—this is crucial for indoor and balcony gardens
- Skip overhead watering or watering late in the evening. Moist foliage at night invites fungal growth
- Place even shade-loving plants in gentle morning sunlight once a week to help deter infections
- Spray neem oil solution (1 tsp neem oil + a few drops of dish soap + 1 litre of water) during high humidity seasons as a preventive measure
How to Treat Powdery Mildew in Container Plants
If your plant is already affected:
- Isolate the plant to prevent the spread to other plants
- Trim off all visibly infected parts using clean, sharp pruners
- Do not compost diseased leaves—dispose of them in a sealed trash bag
- Wipe the plant gently with a wet tissue or cloth to remove surface mildew
- Apply a fungicide—I use SAAF fungicide, and rotate it with neem oil spray (neem oil 1tsp + dish soap liquid 1tsp + 1 liter of water) every few days
- Move the plant to a spot with good airflow and indirect sunlight—sunlight acts as a natural disease suppressant
With consistent care and proper observation, you can save the plant and prevent future attacks. Powdery mildew might look alarming, but it’s treatable when caught early.
💧 Mushy Stems or Roots: Root Rot Alert in Container Plants
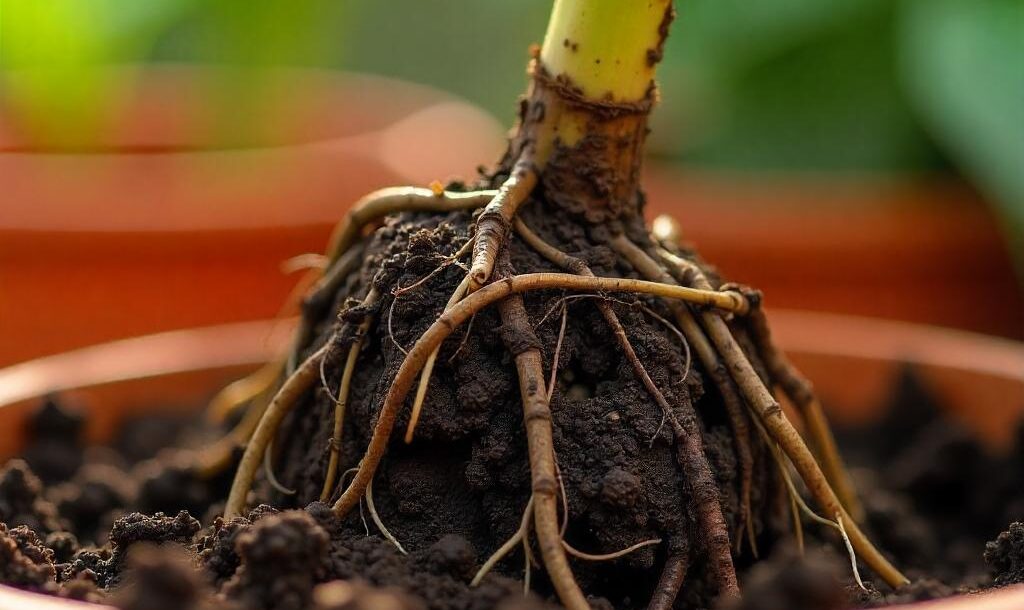
I hate root rot—it was one of my worst nightmares during my early container gardening days. Even now, I still run into it occasionally. But here’s the good part: if you spot the early signs of root rot, you can still save the plant before it dies completely.
Causes of Root Rot in Potted Plants
Root rot is caused by various fungi, pathogens, and water mold infections. Using non-sterilised garden soil increases the risk, as it often contains harmful microbes. But sometimes, even healthy potting mix can lead to root rot. Why?
It’s mostly due to:
Overwatering
Poor drainage
Lack of soil aeration
Over-fertilization
Poor air circulation
Overwatering is the number one killer in container gardening. A common myth is that more water means more growth—false. You should only water when the topsoil feels dry to the touch.
Poor drainage combined with overwatering leads to soggy soil and mushy roots. There are two types of poor drainage issues:
Pots without proper drainage holes, which cause water to pool on the topsoil
Compacted garden soil or soil without aeration amendments like perlite or vermiculite
This soggy condition creates the perfect environment for root rot fungi to thrive.
Poor air circulation, especially in crowded containers or tight indoor setups, also causes problems. It invites pests and pathogens, and these pests often carry diseases that weaken your plant after an attack.
Inside the soil, if there’s no proper airflow, oxygen flow to the roots is cut off, which weakens them and makes them prone to infection. Over-fertilising—especially with nitrogen-heavy fertilizers—causes imbalanced growth, which again attracts pests and diseases.
On top of these common mistakes, excess humidity encourages fungal growth on the soil surface, accelerating root rot.
Symptoms of Root Rot in Container Plants
Root rot is tricky—it often develops silently underground. The plant may appear fine until the damage is severe. Here are key signs you shouldn’t ignore:
Wilting even when the soil is moist—a strong early signal of root issues
A fishy or foul smell from the soil while watering
Yellowing leaves, premature leaf drop, even in sunlight and proper care
Soil that stays wet too long, meaning roots have stopped absorbing moisture
Algae formation on topsoil—a major alert
When you check, roots appear brown (instead of white), slimy, mushy, or break off easily
Fewer roots remaining and weakened stems without structure
How to Fix Root Rot in Potted Plants
Isolate the plant immediately to stop the spread
Gently remove the plant from the pot and discard the entire potting mix—don’t reuse or compost diseased soil
Trim off dead parts or infected roots using clean, sterilized pruners
Wash the roots thoroughly under running water to remove all soil
Soak the roots overnight in a 1:10 hydrogen peroxide and water mix
Rinse again, then spray the entire plant with neem oil solution to remove surface pathogens
Repot in a well-draining potting mix containing perlite, vermiculite, cocopeat, and compost
Add:
Bonemeal powder to boost healthy growth
Neem cake powder to prevent soil-borne diseases
Balanced NPK fertilizers—use nitrogen for foliage, potassium and phosphorus for root recovery
Place the plant in a clear container with bright, indirect sunlight. Water only when the soil appears dry from the outside. Once you see healthy white roots forming, repot the plant again into a fresh potting mix tailored to its specific needs.
🐞 Sticky Residue or Mold: Pest Trouble + Sooty Mold in Potted Plants
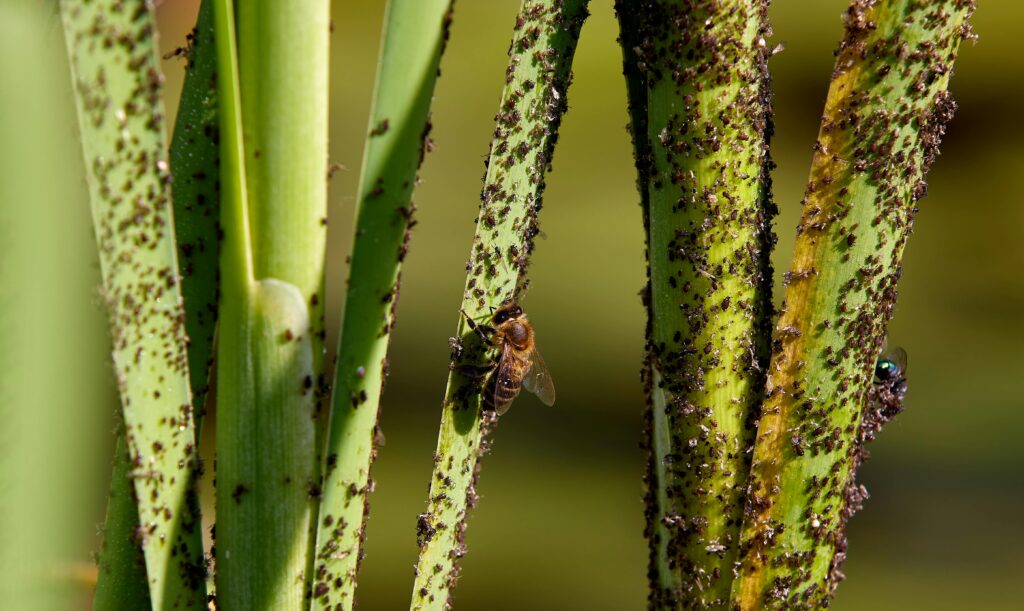
You may notice a glue-like or sticky mold on your plants—this is often an early sign of pest infestations, such as aphids or mealybugs. But did you know that this sticky residue is a fungal growth? It affects your plant’s health even before the pest damage becomes visible. This mold, known as sooty mold, also attracts ants, which can rapidly spread the infection throughout the plant.
Early Signs of Sooty Mold on Plants
Appears as black, grey, or white fungal layers
Texture can be powdery, sticky, or velvety
Forms on stems, leaf edges, or leaf nodes
Caused by the honeydew secretions of sap-sucking pests like aphids, mealybugs, and whiteflies
If left unnoticed, this mold spreads quickly over the plant, damaging both its health and appearance.
How Sooty Mold Affects Potted Plants
Blocks sunlight, which reduces photosynthesis and leads to yellowing and wilting
Weakens the plant’s natural resistance, making it more vulnerable to further pest infestations
Clogs leaf pores, disrupting the gas exchange process essential for plant growth
Affects fruit and flower formation in edible or flowering plants
Indicates the early stages of pest trouble, so prompt action is needed
How to Fix Sooty Mold on Container Plants
Isolate the affected plant immediately to prevent further spread
Trim off severely affected leaves or stems—no need to cut back the whole plant
Dispose of the trimmed parts away from your garden—don’t compost them
Wear disposable gloves and gently wipe the mold off using:
A solution of hydrogen peroxide (1 part) + water (4 parts)
Or a soft cloth dipped in neem oil solution or organic fungicide
After cleaning, spray neem oil weekly until the plant shows no signs of residue or pest activity
Check the roots for health—if the roots are affected:
Rinse them with a 3% hydrogen peroxide solution (1:10 ratio with water)
Remove all old soil and repot in a clear container with well-aerated potting mix
Keep the plant in bright indirect sunlight and monitor closely
Only reintroduce the plant to your garden or balcony once it’s fully recovered
By treating sooty mold early and addressing the pest problem behind it, you protect not only one plant but your entire container garden from further damage.
🌱 Soil-Borne Fungal Diseases: Hidden Threats in the Potting Mix
What Are Soil-Borne Fungal Diseases?
Soil-borne diseases are not like foliar diseases that show visible signs on the leaves. These infections begin below the surface, silently damaging the plant before any signs appear. That’s why many soil-borne fungal diseases go unnoticed until it’s too late, and they often lead to sudden plant death in container gardening.
These diseases are usually caused by common soil fungi such as Pythium, Rhizoctonia, and Fusarium. These pathogens live in the soil and attack the roots, weakening the plant from within over time. Once the root system is affected, the entire plant slowly declines.
How They Spread in Container Gardening?
In potted plants, soil-borne fungi often spread through:
Contaminated garden soil or compost, especially compost made with infected plant debris, meat, or dairy waste
Non-sterilized garden soil mixed into potting mixes
Overwatering, which creates a soggy environment ideal for fungal growth
Poor air circulation around the pots or within dense soil
Lack of proper drainage in the pots
Using unclean tools or reused pots that still carry fungal spores from previous use
These small oversights in everyday gardening practices can easily trigger fungal infections in your plant containers.

Soil-borne diseases are hard to detect early, but here are signs you should never ignore:
Root rot or damping-off in seedlings
Yellowing leaves, wilting, or stunted growth, even when the soil is moist
A foul or fishy smell from the soil during watering
Slimy, mushy roots or roots turning brown instead of white
These symptoms usually show up when the roots are already infected.

Always use a sterile potting mix for containers—avoid using unclean or reused soil
Ensure all pots have proper drainage holes
Improve soil aeration by adding perlite, vermiculite, or cocopeat
Avoid overcrowding pots, and maintain good air circulation between plants
Don’t over-fertilise—excess nitrogen can stress roots and attract pests
Add soil protectors like neem cake powder, Trichoderma-enriched compost, or aerated compost teas to the soil

If you suspect a soil-borne fungal infection:
Isolate the infected plant
Remove all affected soil completely—don’t reuse or compost it
Wash the roots thoroughly and soak them in a 3% hydrogen peroxide solution (1 part peroxide:10 parts water)
Apply bio-fungicides or spray the plant with neem oil
Repot in a clean container using a fresh, well-draining potting mix with organic matter and aeration additives

Practice soil rotation or alternate soil mixes in your containers
Only use sterilized potting soil
Regularly inspect roots while repotting
Clean all tools and pots after handling infected plants
By paying attention to soil health and root care, you can prevent these hidden fungal threats and maintain a thriving, disease-resistant container garden.
🧪 Bonus Tip: How I Diagnose Plant Problems in My Garden
My go-to method: Observe → Inspect roots → Compare symptoms → Act
Over the years, I’ve trained myself not to jump to conclusions. When something looks off, I follow this simple step-by-step:
Observe the plant closely – leaves, stems, soil, overall behaviour
Gently check the roots – white roots = healthy, brown/mushy = trouble
Compare the symptoms – match it with common plant issues
Then act accordingly – isolate, treat, trim, or repot based on the issue

💡 Final Thoughts: Plants Speak—You Just Need to Watch
No garden is completely free from problems—even experienced gardeners lose plants sometimes. But the key is in watching, listening, and learning.
The earlier you spot an issue, the easier and more affordable it is to fix. Most plant problems start small—if you catch them early, you can often save the plant with just a few simple steps.
Remember:


Let your plants speak—and just take a moment to watch them closely.
 Want to Dive Deeper?
Feeding your plants the right way? Check out my guide on liquid fertilizers for healthy, consistent growth in containers.
Pests troubling your garden? Explore natural pest control tips that I personally follow to keep bugs in check—without harsh chemicals.
Unsure about your soil mix? Read my DIY potting mix blog to create well-draining, healthy soil tailored for your container garden.
- 👉 Read my blog section on pest and fungal control after the monsoon to protect your plants from common post-rain infections.
- 💨 Think wiping leaves is enough? Think again. Discover smarter dust-cleaning hacks for terrace plants in India.
 Need Quick Remedies?
I use these regularly in my garden to fight plant diseases and root infections:
SAAF Fungicide – My go-to for fungal problems
Neem Oil Spray – A natural fix for pests and fungal issues
Hydrogen Peroxide – A must-have for root rot rescue

Have you ever dealt with any of these plant diseases in your container garden?
Share your experience below—or drop your questions if you’re unsure what’s affecting your plant. I’d love to hear from you and help out!


 Need Quick Remedies?

Pingback: How to Grow Fresh Leafy Greens in Containers – 5 Easy Home Gardening Tips - Not_So_Green_Thumb